Mastering Panning Photography: Techniques and Tips for Capturing Dynamic Shots
Panning is one of the most technically demanding techniques in photography — and one of the most rewarding when it works. The goal is a sharp subject against a streaked, blurred background that conveys speed and movement in a single still frame. Getting there consistently requires practice, the right settings, and an understanding of how your body, the camera, and the subject all need to move together.
1. Understanding Panning Photography
a. The Principle
Panning involves following a moving subject with the camera during a slow shutter speed exposure. The camera moves in sync with the subject, keeping it relatively sharp while the static background blurs into horizontal streaks. The effect creates a visual sense of speed that a fast shutter speed — which freezes everything — cannot achieve.
b. Choosing the Right Focal Length
Telephoto lenses in the 70–200mm range are commonly used for panning — they allow you to isolate the subject and create more pronounced background blur. Wider lenses can also be effective, particularly when photographing subjects at closer distances. I use the Panasonic Lumix S PRO 70-200mm f/4 O.I.S. for most panning work — image stabilization can be useful during panning, but it depends on the lens, camera, and stabilization mode being used. Some systems offer a dedicated panning mode that stabilizes on one axis only, which works well. Others may fight the intentional movement. Always test your specific setup.
2. Essential Settings for Panning Photography
a. Shutter Speed
The shutter speed is the critical variable. Too fast and the background does not blur — you lose the effect. Too slow and the subject blurs beyond recognition. Start around 1/30 to 1/60 second and adjust based on the speed of the subject and the amount of blur you want.
As a practical starting point:
• Cyclists: around 1/30 to 1/60 second
• Cars at moderate speed: around 1/60 to 1/125 second
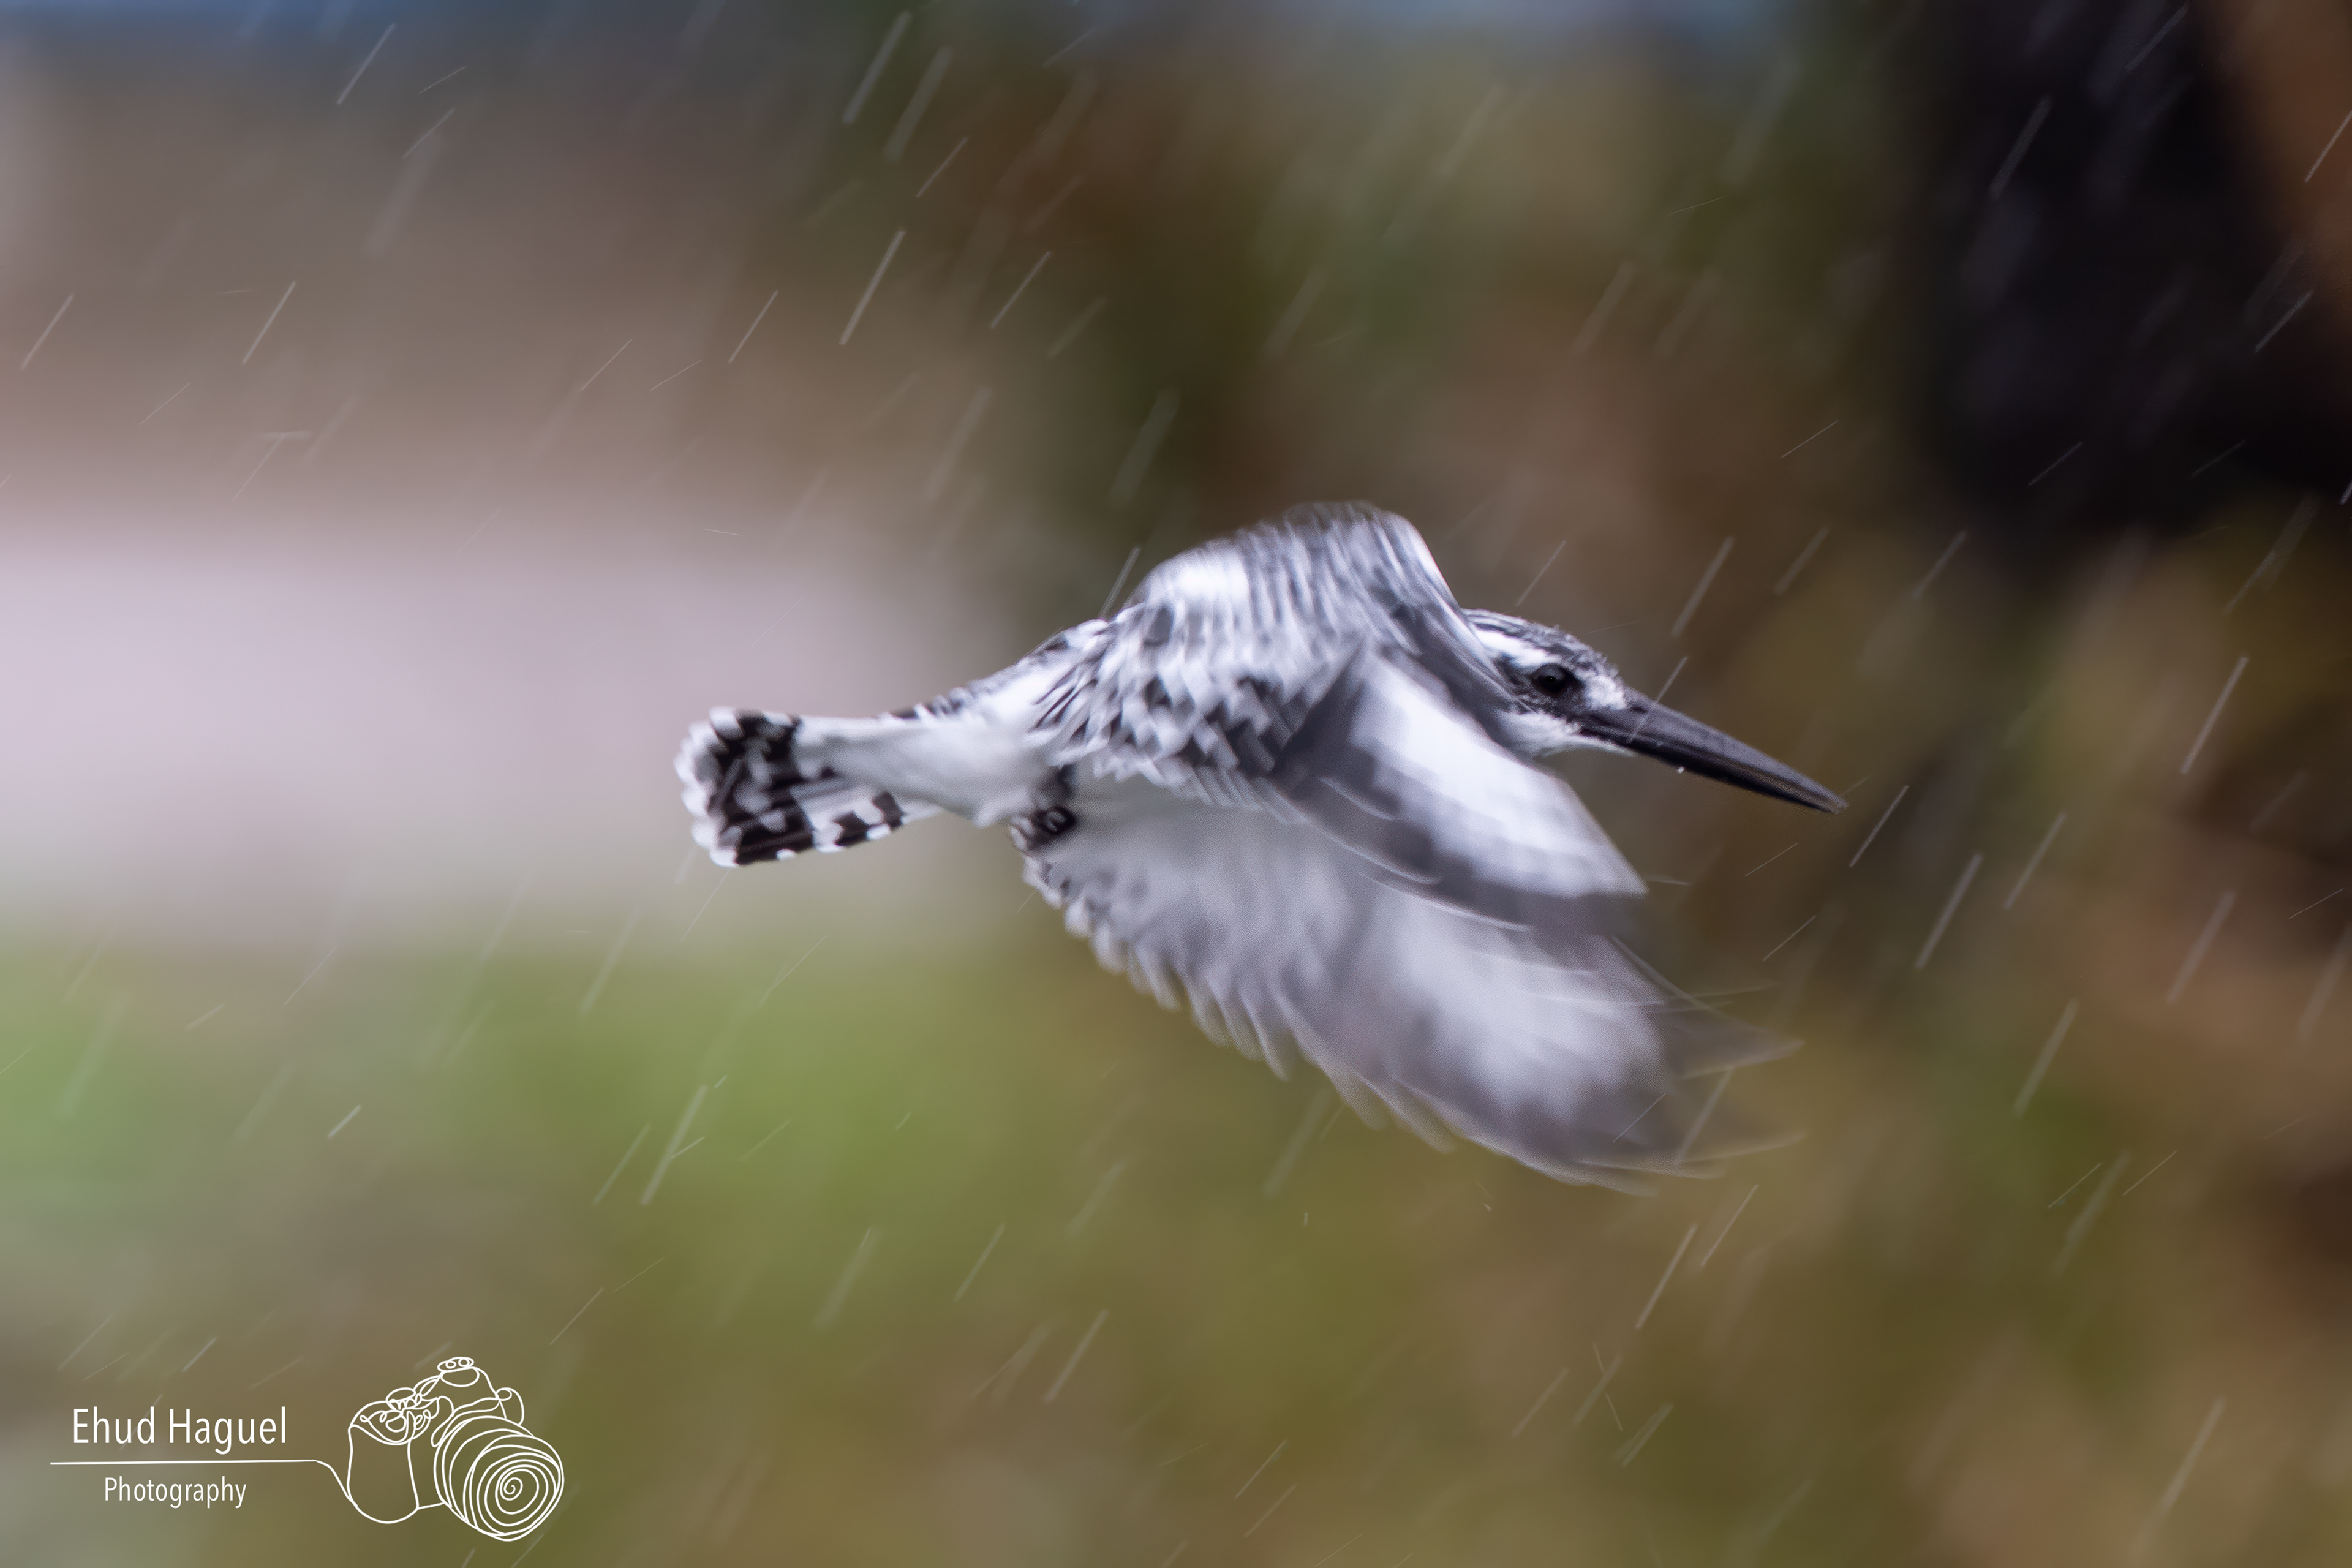
• Larger birds in steady flight: around 1/60 to 1/125 second
• Smaller, erratic birds: harder to pan cleanly — requires more trial and error
These are starting points, not rules. The right speed depends on subject distance, focal length, and how much blur you want in the background.
Panning has a high reject rate even for experienced photographers. Expect a significant proportion of your frames to be unusable — this is normal and expected. Panning rewards volume and honest selection.
b. Aperture
A wider aperture — f/2.8 to f/5.6 — allows more light into the camera, facilitating the slower shutter speeds panning requires and creating a shallower depth of field that helps isolate the subject. Balance the aperture against the depth of field you need — a narrow subject like a bird in flight may require slightly more depth of field than a wide aperture provides.
c. ISO
Start at a low ISO — ISO 100 or 200 — in well-lit conditions. In lower light, increase ISO gradually to maintain the desired shutter speed. Higher ISO values introduce noise, so find the balance between exposure and image quality for the conditions you are working in.
3. Mastering the Technique
a. Stance and Body Position
Stand with your feet shoulder-width apart and your body oriented parallel to the subject's anticipated path. Pivot from your hips and torso — not just your arms — to follow the movement smoothly. A stable, rooted stance is the foundation of a consistent pan. Body-led movement is almost always smoother than arm-only movement — the hips act as a natural pivot that keeps the arc consistent.
b. Tracking the Subject
Begin tracking the subject before you press the shutter, not at the moment you fire. Follow the movement at a consistent speed through the exposure and continue tracking after the shutter closes. The follow-through is as important as the motion itself — stopping abruptly at the moment of exposure is one of the most common causes of blur on the subject.
c. Autofocus
Set your camera to Continuous AF mode. This allows the autofocus system to track the subject's movement and adjust focus during the pan. Select an autofocus point or zone that covers the subject's expected position in the frame, and use burst mode to capture multiple frames through the pan — only a portion will have the sharpness and blur combination you want.
4. Best Subjects and Backgrounds for Panning
Not every moving subject produces a strong panning image, and the background matters as much as the subject itself.
Panning works best when the subject moves along a relatively predictable path — parallel to your position or on a consistent arc. Erratic, unpredictable movement makes it very difficult to maintain smooth tracking through the exposure.
The background determines much of the aesthetic quality of the final image. A background with repeating elements, multiple tonal layers, or strong colors produces richer, more visually interesting streaks than a plain sky or a flat wall. A "messy" background at normal shutter speeds can actually become an asset in panning — the blur transforms chaos into movement.
Distance between the subject and the background also matters. A background that is close to the subject blurs less dramatically. A background that is far away blurs more completely, giving cleaner separation.
When panning is worth it:
• When the background adds visual interest to the image
• When motion is central to the story you want to tell
• When a frozen frame would feel too static for the subject
When panning may not be the right choice:
• When the subject is too small in the frame
• When the background is empty sky with no visual content
• When guaranteed sharpness matters more than expressive motion
5. Panning Birds vs. Vehicles
The panning technique is the same for both, but the conditions are very different.
Vehicles move along predictable, horizontal paths. The speed is consistent, the direction does not change, and you can often position yourself to know exactly where the subject will be. This makes vehicles an excellent training subject — the consistency allows you to isolate and work on specific elements of your technique.
Birds in flight are far less predictable. They change altitude, adjust their angle relative to you, and vary their speed in ways that vehicles do not. The hit rate is lower, and the wing position at the moment of exposure adds another variable that vehicles do not have. A technically clean pan of a bird at a poor wingbeat position is still a weak image.
For practical purposes, starting with vehicles or cyclists and moving to birds once your technique is consistent is a reliable path to improvement. The detailed application of panning to bird photography is covered in Mastering Bird Photography.
6. Common Panning Mistakes
Understanding what goes wrong is often more useful than being told what to do right.
Stopping the pan at the moment of exposure. This is the single most common cause of blur on the subject. The pan must continue smoothly through the entire exposure and beyond.
Shutter speed too fast. The background does not blur, and the motion effect disappears entirely. The image looks like a normal action shot taken at the wrong settings.
Shutter speed too slow. The subject blurs past the point where it reads as sharp. This is recoverable by increasing shutter speed, but many photographers make this mistake repeatedly before finding their range.
Locking onto the background instead of the subject. Continuous AF is tracking something — if the background is visually dominant, the system may lose the subject. Use a narrow focus zone in complex environments.
Arm-only movement. Panning only with the arms produces inconsistent arc and introduces shake. The hips and torso need to lead.
Trying to pan unpredictable subjects before the technique is consistent. Erratic subjects expose every weakness in your technique. Build consistency with predictable subjects first.
Expecting a high hit rate. Even technically strong panning sequences have a high proportion of unusable frames. This is not a sign of failure — it is how the technique works.
7. How to Practice Panning
Deliberate practice with progressively more demanding subjects is the fastest path to consistent results.
Start with cars on a road. Position yourself at a consistent distance from a road with moderate traffic. The speed is predictable, the path is horizontal, and you can repeat the same shot many times in a short session. Review each set of frames and focus on one element at a time — first smoothness of motion, then shutter speed, then autofocus tracking.
Move to cyclists. Cyclists are slightly less predictable than cars but still follow a consistent path. Their slower speed usually requires a slightly slower shutter speed to achieve the same background blur, which is a useful challenge.
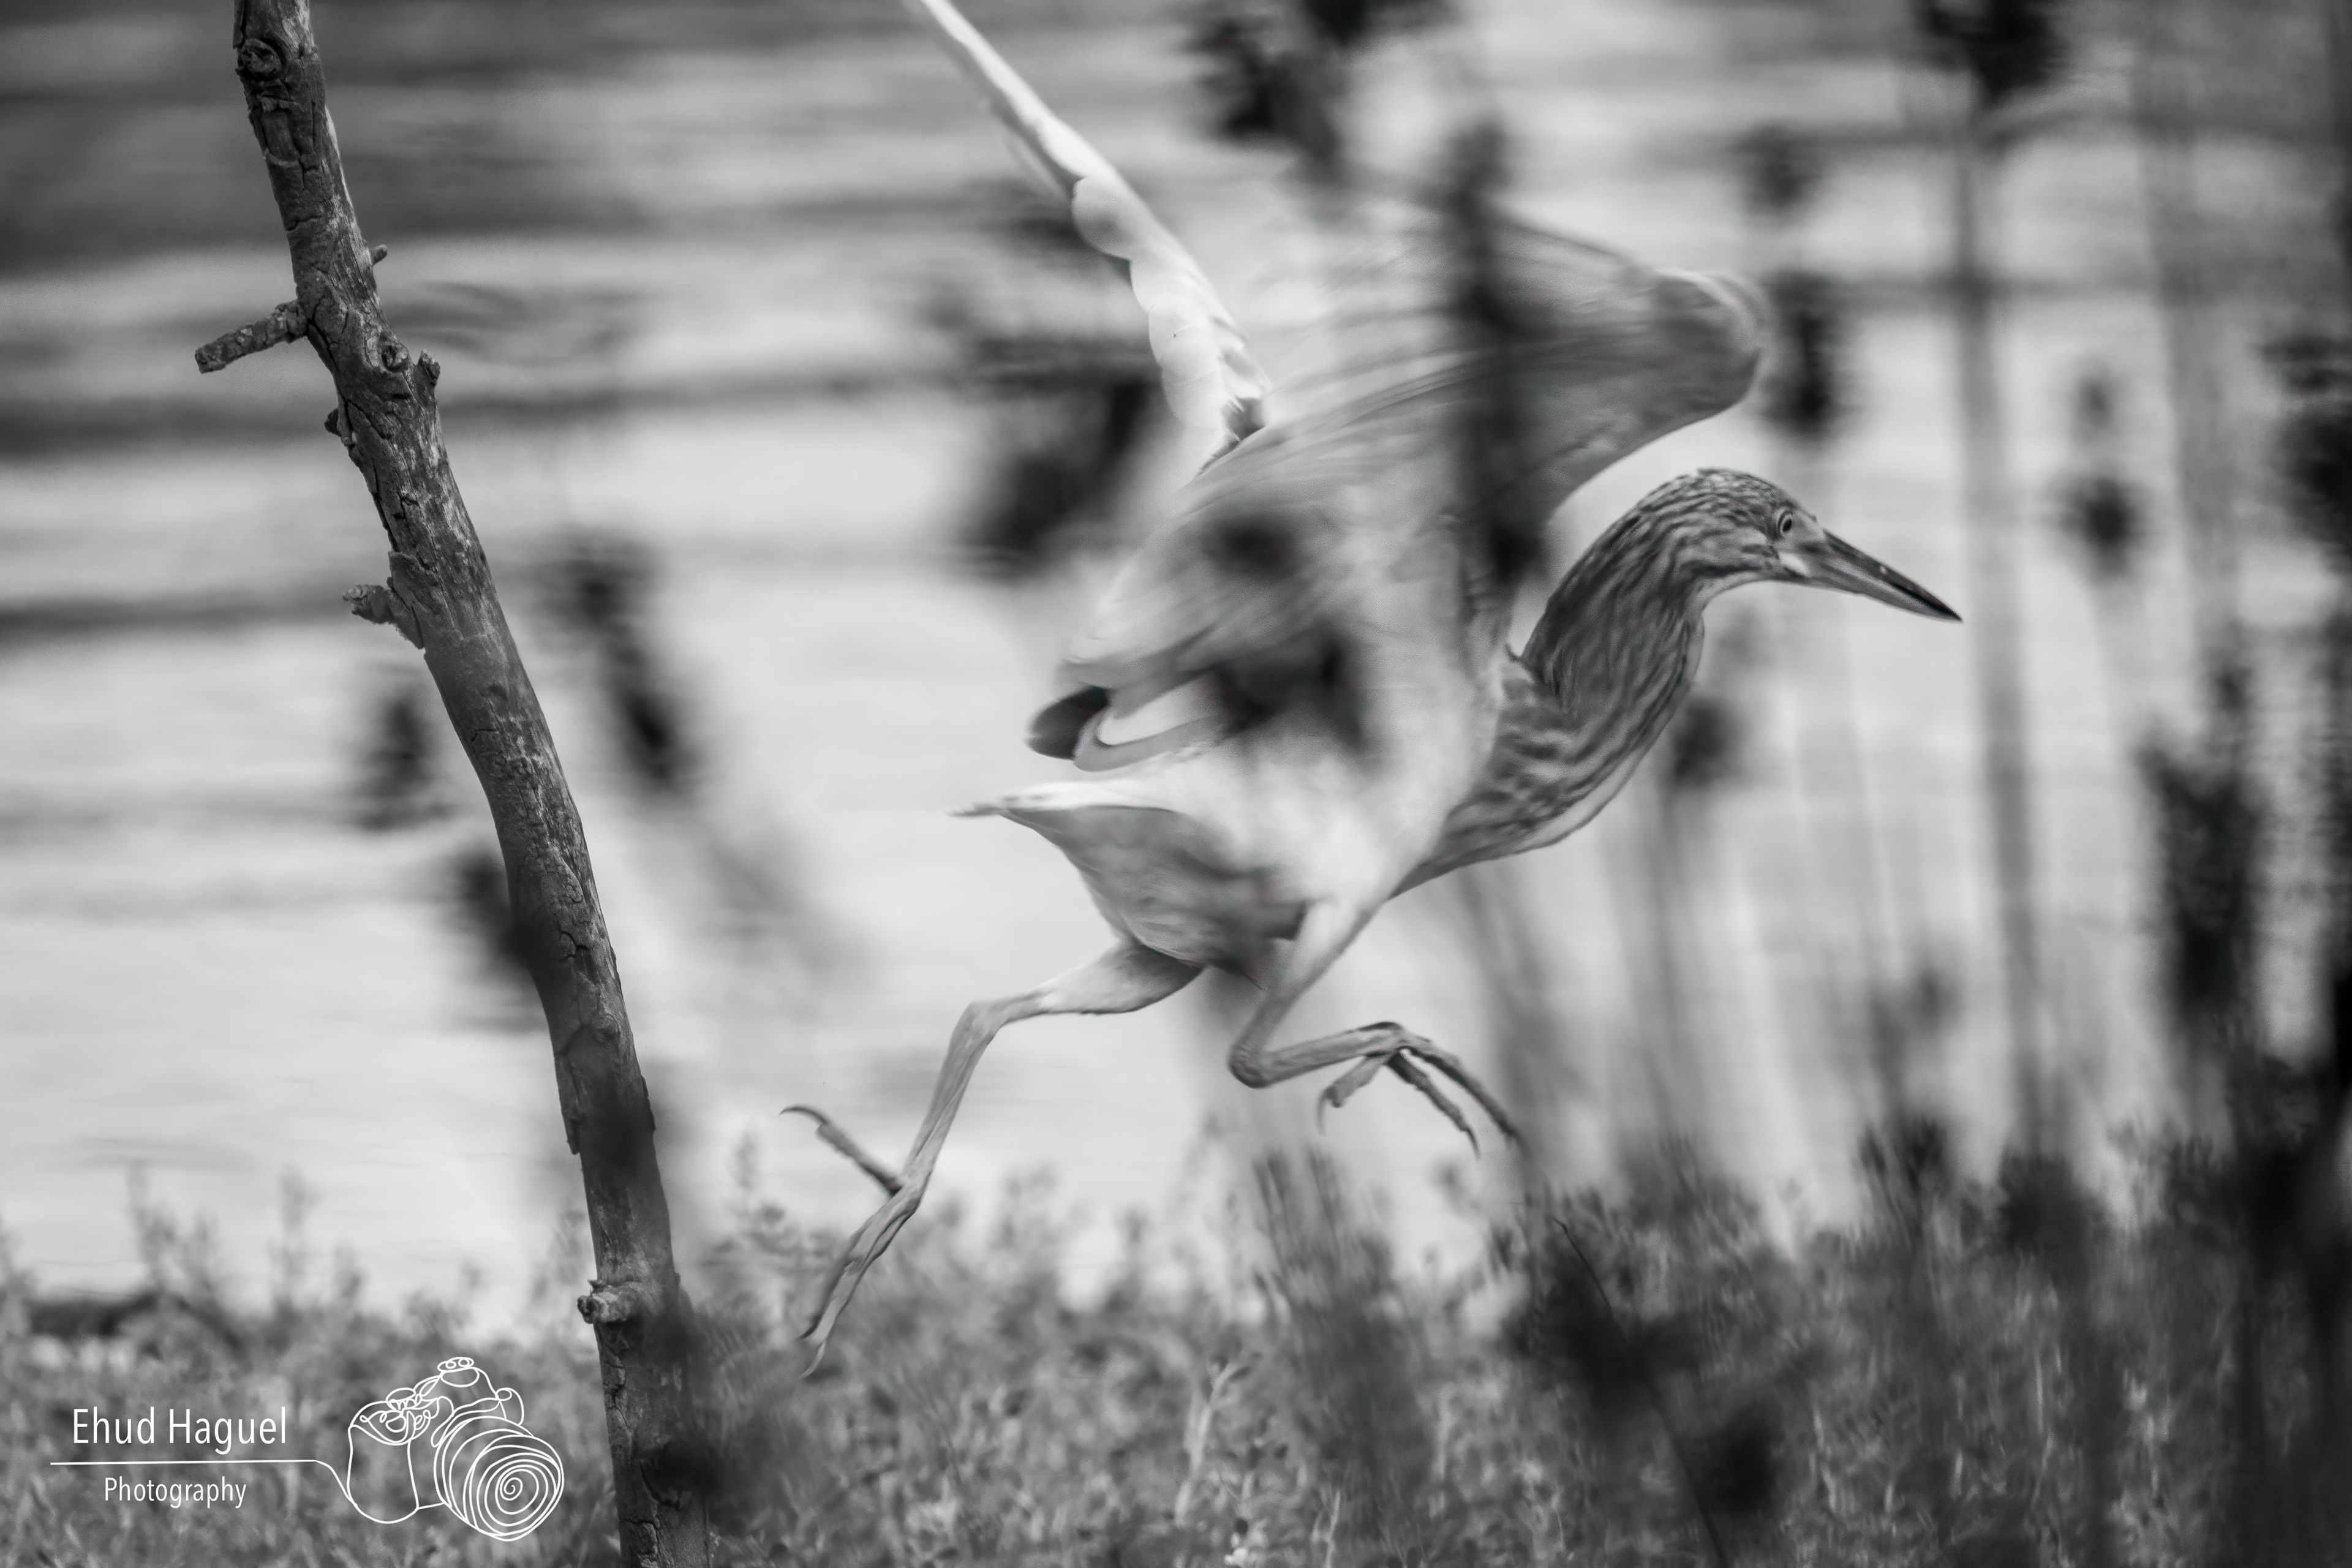
Then try larger birds with predictable flight paths. Herons, pelicans, and other large birds that glide rather than flap rapidly are a good bridge between vehicles and the full challenge of small bird panning. Their flight paths are more consistent and their slower wingbeat frequency gives you more margin.
Experiment with different subjects, backgrounds, and shutter speeds as you progress. A cyclist against a complex, colorful background produces a very different image from a bird against an open sky. Both can work — the technique is the same, but the aesthetic result differs significantly.
Review honestly. After each session, look not just at sharpness but at background quality, subject position in the frame, and the consistency of your motion arc. Identify exactly what failed on each unusable frame — stopping the pan too early, wrong shutter speed, autofocus on the background, inconsistent arc. That specificity is what drives improvement faster than simply shooting more.
Panning is one of those techniques that, once mastered, opens up a whole category of images that are not available any other way. The investment in practice is real, but the results — a sharp subject suspended in a blur of motion — are something that no amount of post-processing can replicate from a frozen frame.
For applying panning specifically to birds in flight and other fast-moving wildlife subjects, see Mastering Bird Photography.
Leofoto Coupon Code: 12% Off with EH12
Use code EH12 at checkout on the Leofoto website to get 12% off Leofoto tripods, ball heads, monopods, and accessories. This Leofoto discount code is active and available to readers of this site.