Landscape Photography with Long Exposure Technique: A Comprehensive Guide
Long exposure landscape photography is one of the few techniques that can turn a familiar scene into something the eye never actually saw in real time. A wave becomes shape instead of chaos. Fast-moving clouds become direction and flow. Reflections simplify. Light accumulates.
What draws me to long exposure is not the effect by itself, but the way it can remove visual noise and reveal structure. When it works, the image feels quieter, cleaner, and more intentional than the scene looked at the moment I pressed the shutter.
1. When Long Exposure Works and When It Does Not
Long exposure is a tool, not a default. It works best when there is meaningful motion in the scene, such as water, clouds, or light that the technique can transform into something visually different from the static frame.
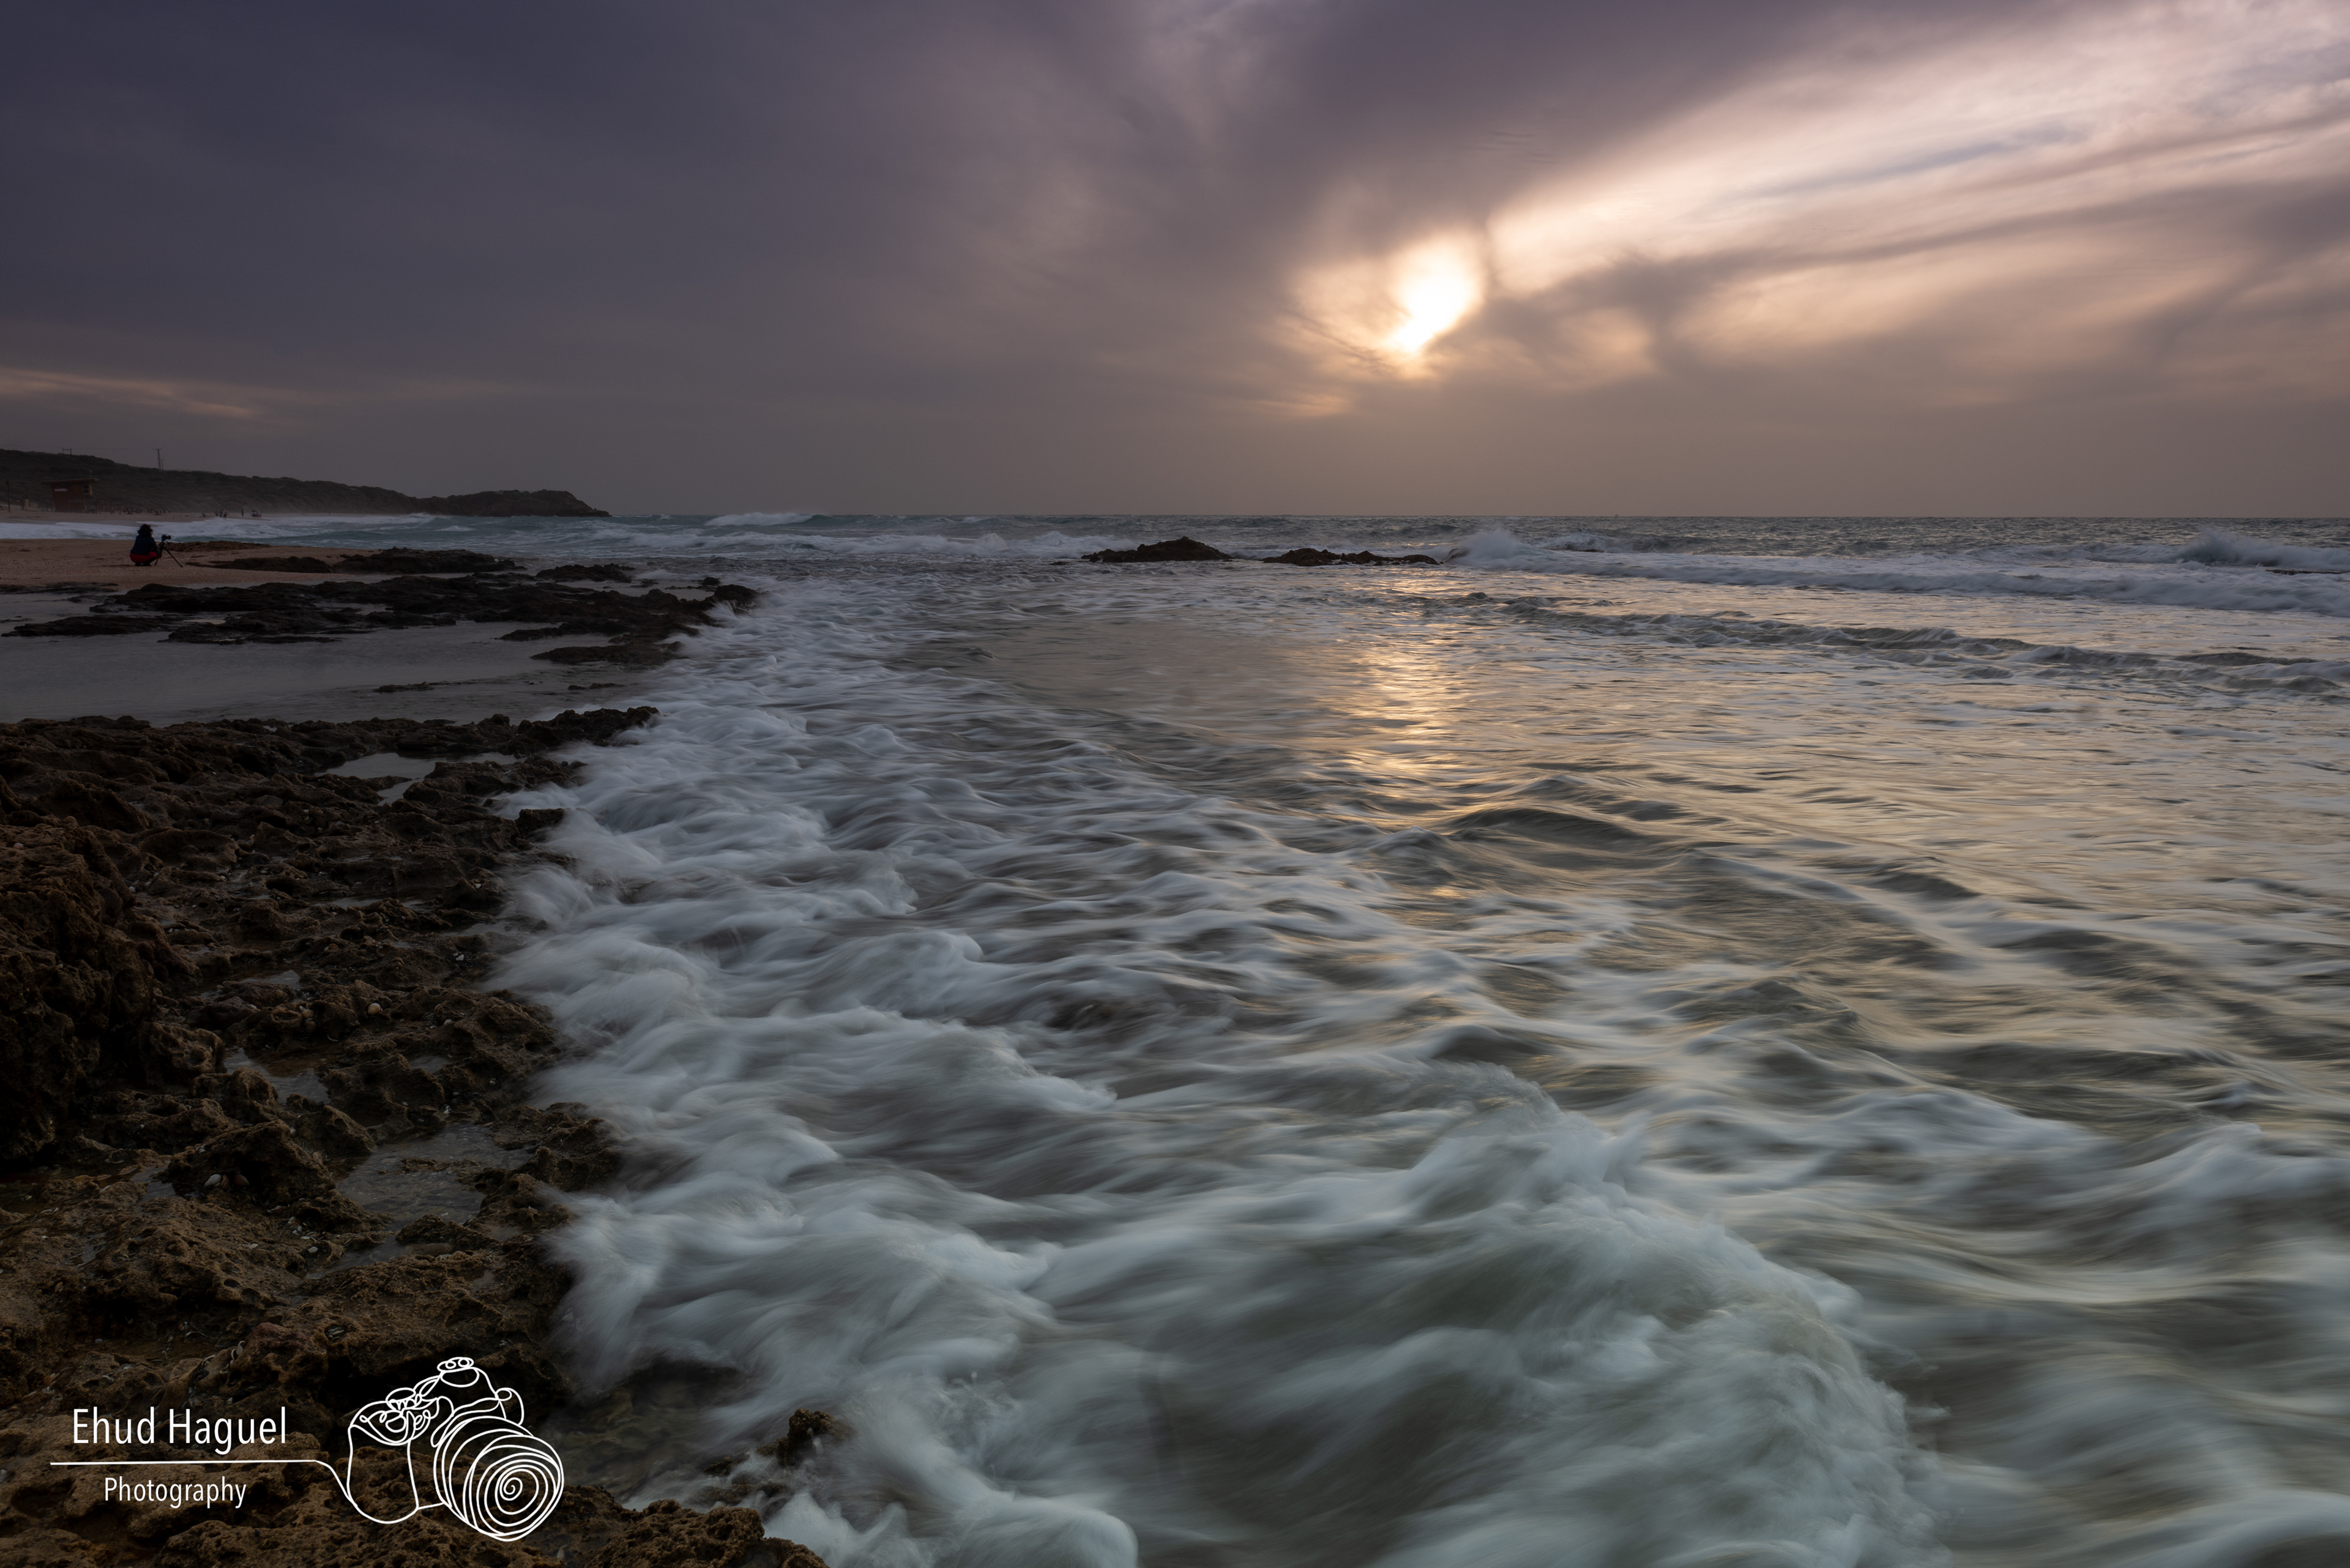
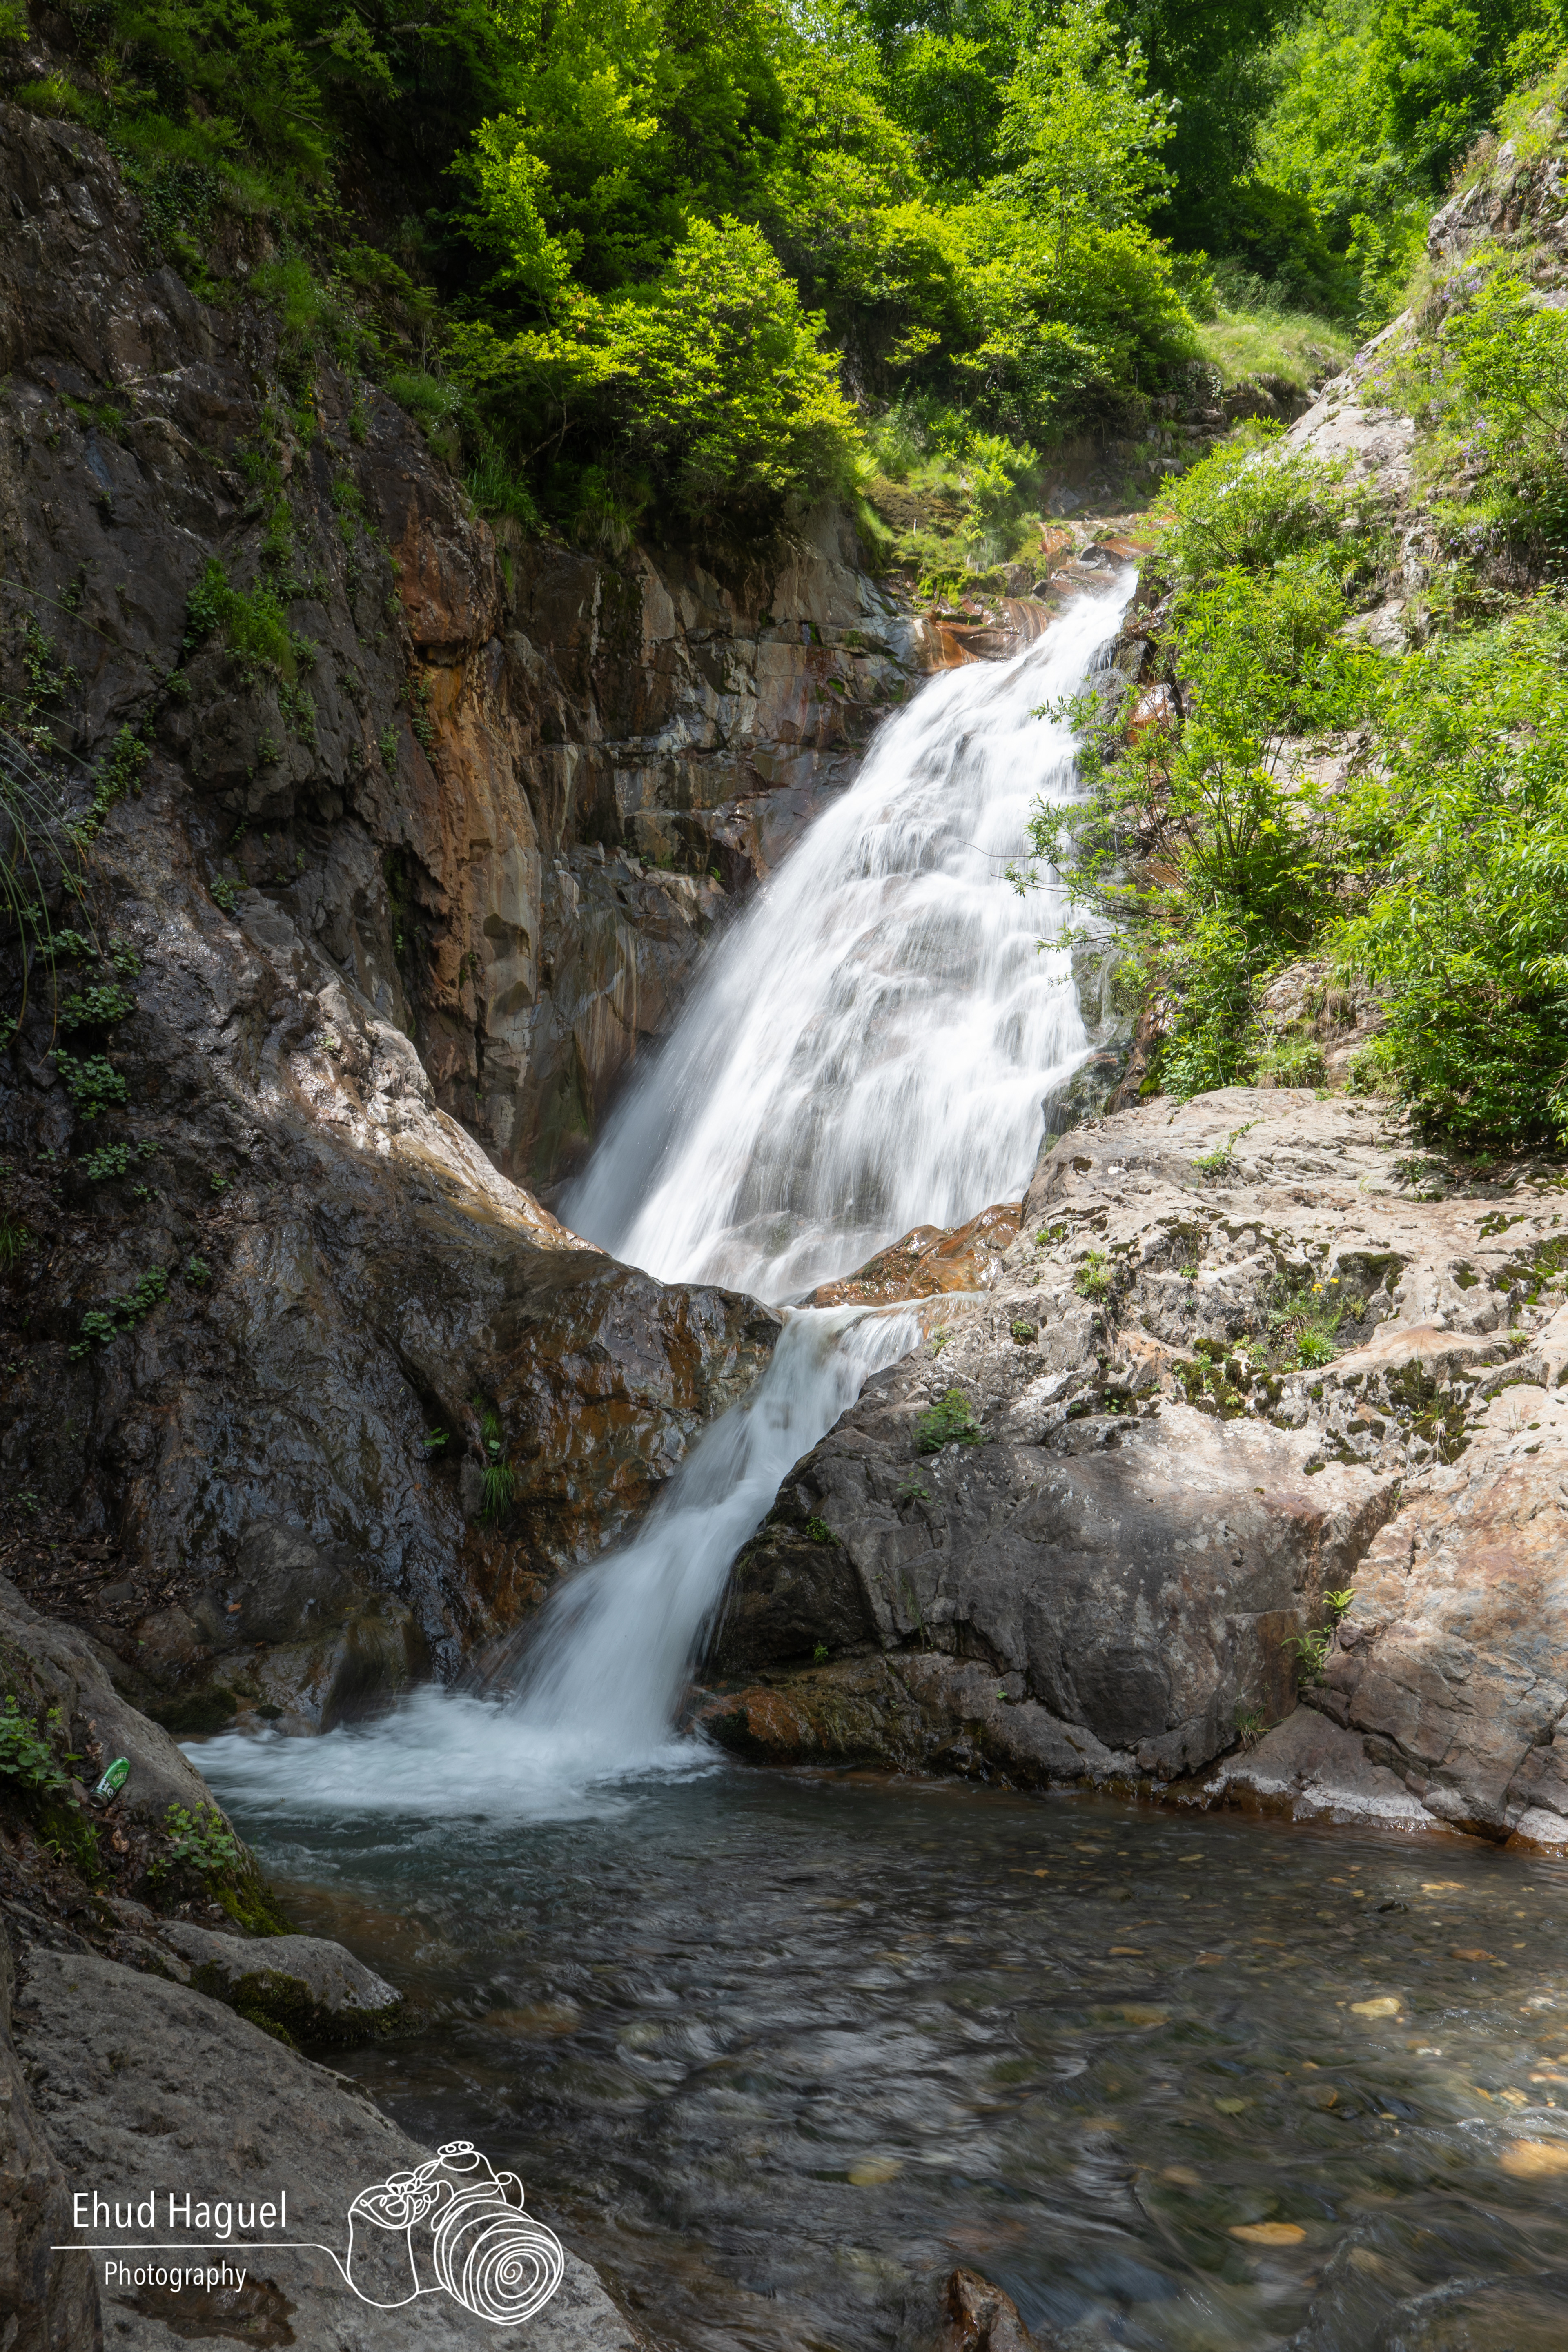
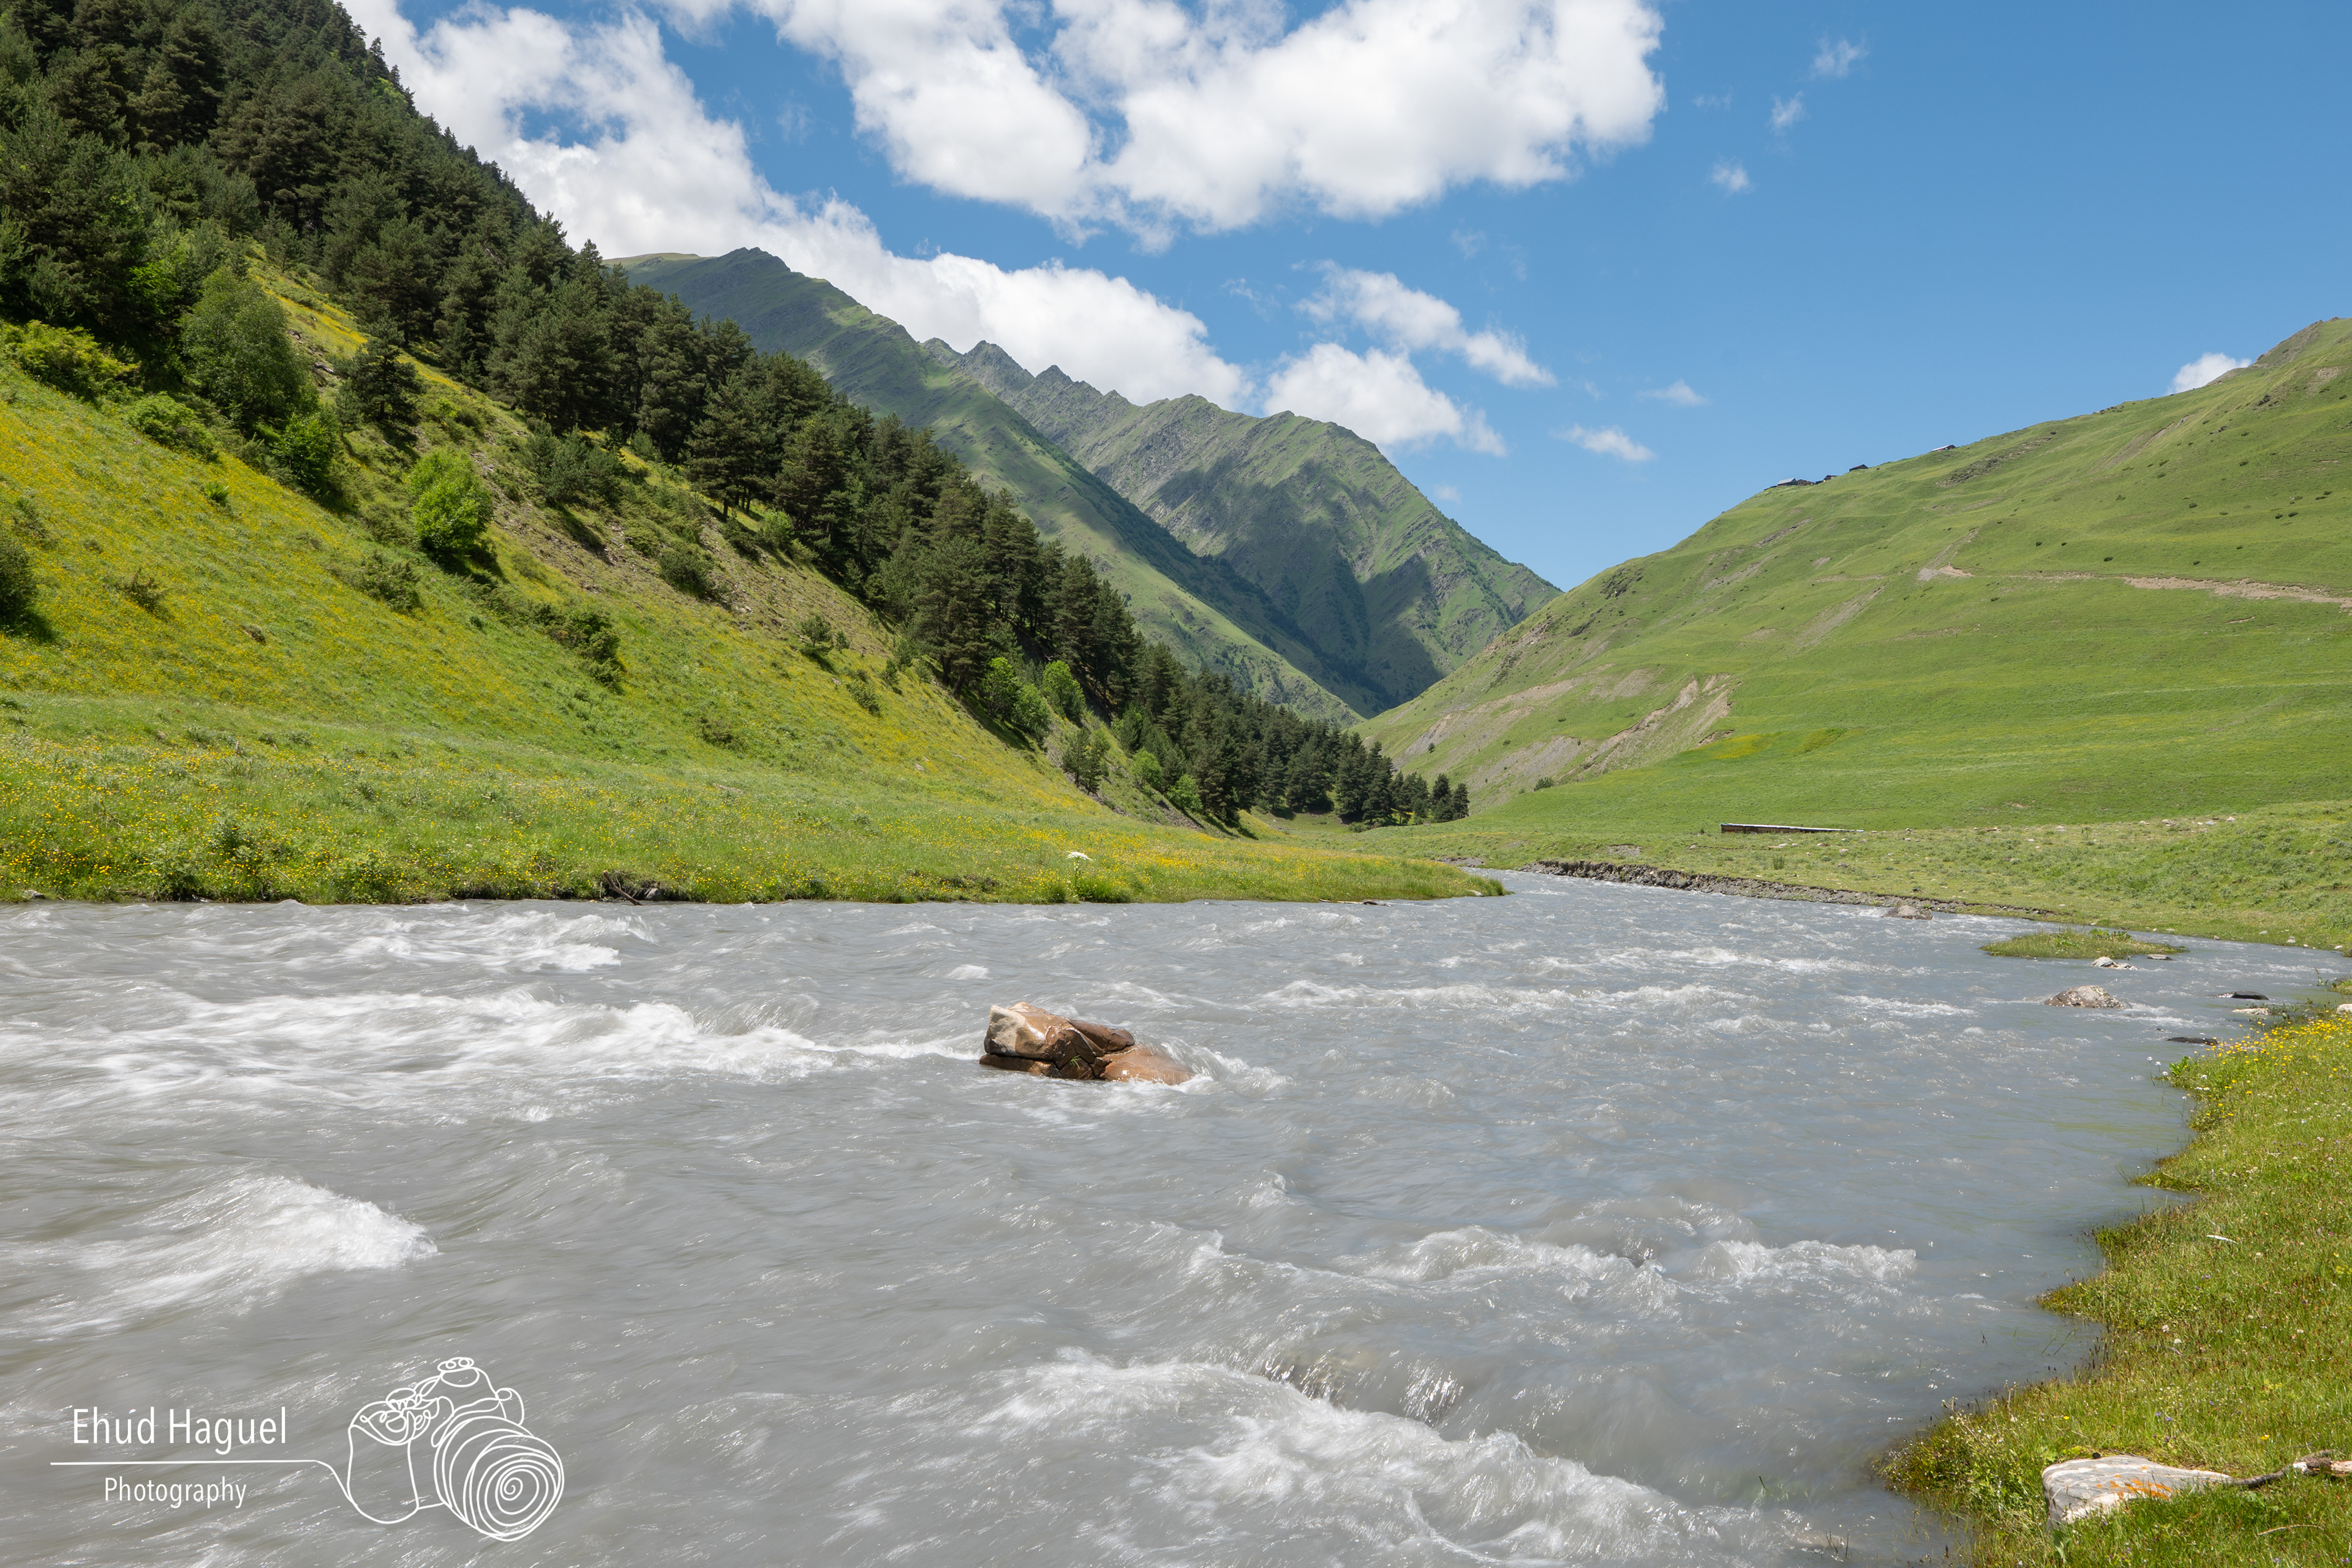
It works well when the moving element has a clear direction or pattern. A river winding through a frame becomes a silky ribbon that leads the eye. Waves retreating from rocks leave a smooth, luminous surface. Fast-moving cloud streaks add drama and scale to a sky that would otherwise feel flat.
It does not work well when the motion is chaotic without direction, when the scene has no interesting static anchor, or when the effect becomes the whole point of the image. A technically perfect silk-water photograph with nothing else to hold the eye is still a weak image. The long exposure is what makes the image look different; the composition is still what makes it worth looking at.
2. Choosing Shutter Speed by Effect
Shutter speed in long exposure photography is a creative decision, not just a technical one. Different speeds produce fundamentally different results with the same subject.
Moving water:
• 1/4 to 1/2 second: individual water threads visible, energetic and textured
• 1 to 4 seconds: continuous soft flow, some structure retained
• 15 to 30 seconds: water becomes completely smooth and luminous
Several minutes: the surface flattens entirely, which can feel abstract or empty depending on the scene
Clouds:
• 10 to 30 seconds: visible streaking begins on faster-moving clouds
• 1 to 3 minutes: strong directional movement, dramatic on the right day
• 5 minutes or more: clouds dissolve almost entirely, leaving smooth gradients
Ocean and coast:
• 1 to 4 seconds: waves blur into a soft wash around rocks
• 15 to 30 seconds: water surface becomes mirror-like between waves
• Longer exposures flatten everything. This can work well in minimalist compositions, but it demands a strong foreground.
The right speed is the one that shows the motion in the way the scene demands. Start with a test shot, review the result, and adjust deliberately.
3. Aperture, Depth of Field, and Diffraction
For landscape long exposures, aperture in the f/8 to f/11 range is typically the most useful. This range offers a strong balance between depth of field and optical sharpness for most scenes.
Stopping down further (to f/16 or beyond) increases depth of field marginally but introduces diffraction softening. On high-resolution sensors, diffraction at f/16 is visible on close inspection, and at f/22 it becomes significant. The decision to go beyond f/11 should be deliberate, based on whether the extra depth of field is genuinely needed, not as a default for "more sharpness."
A narrow aperture also reduces the amount of light entering the lens, which helps achieve longer shutter speeds in moderate light. But this should be a consequence of the aperture choice, not the reason for it.
4. ND Filters in Practice
ND filters reduce light entering the lens, allowing longer shutter speeds than would otherwise be possible. Choosing the right strength depends on the light conditions and the shutter speed you need.
• 3-stop ND (ND8): Useful in low light or golden hour for extending exposures from 1/4 second to 2 seconds. A subtle starting point.
• 6-stop ND (ND64): A versatile mid-range filter. In bright overcast conditions it can extend exposures to 10 to 30 seconds. In golden hour it can push exposures to several minutes. This is often the most practically useful filter for varied conditions.
• 10-stop ND (ND1000): Allows exposures of 30 seconds to several minutes even in bright daylight. Ideal for dramatic cloud movement and completely smooth water. In very bright conditions it is sometimes necessary to combine a 6-stop and a 10-stop filter.
The decision between filters is driven by how much time you want in the exposure. In low light, a 10-stop filter can force unnecessarily long exposures. Know your conditions before choosing.
Reliable 10-stop options include the B+W ND 3.0 and the Hoya ProND 1000. If you carry multiple filters in the field, a padded filter case helps keep them clean, organized, and protected from scratches.
• GND Filters: These balance the exposure between a bright sky and a darker foreground, and they are most effective when the horizon line is relatively straight. When the horizon is irregular, blending in post-processing is often more practical.
• Polarizing Filters: Reduce reflections and increase color saturation near water. Avoid stacking a polarizer with a strong ND filter unless the scene truly requires it, as the combined light loss and the risk of color cast can make the setup harder to manage. Quality options include the B+W Käsemann High Transmission Circular Polarizer and the Hoya HD3 Circular Polarizer.
5. Composition for Long Exposure
Long exposure changes the visual weight of moving elements. Water and clouds become lighter and softer, which can cause them to recede visually. This makes the foreground (which stays sharp and fully textured) more important compositionally than it would be in a standard exposure.
A strong foreground anchor is essential in most long exposure landscapes. Rocks, tide pools, leading lines, or structural elements in the bottom third of the frame give the viewer somewhere to enter the image and a reference point for the softness above or behind.
The horizon line matters more in long exposure work because the transition between sharp land and moving water or sky is often the most visually active edge in the image. Place it deliberately, either high or low, rather than centered.
Leading lines work particularly well. A river winding into the background, a coastline curving away, or a road that disappears into clouds give the eye a path to follow through both the static and moving elements of the frame.
Ask before shooting: if the motion were frozen (if the water and clouds were sharp), would this still be a strong composition? If the answer is no, the long exposure cannot save it.
6. Field Workflow
A repeatable workflow reduces errors and saves time in the field, especially during golden hour when the light changes quickly.
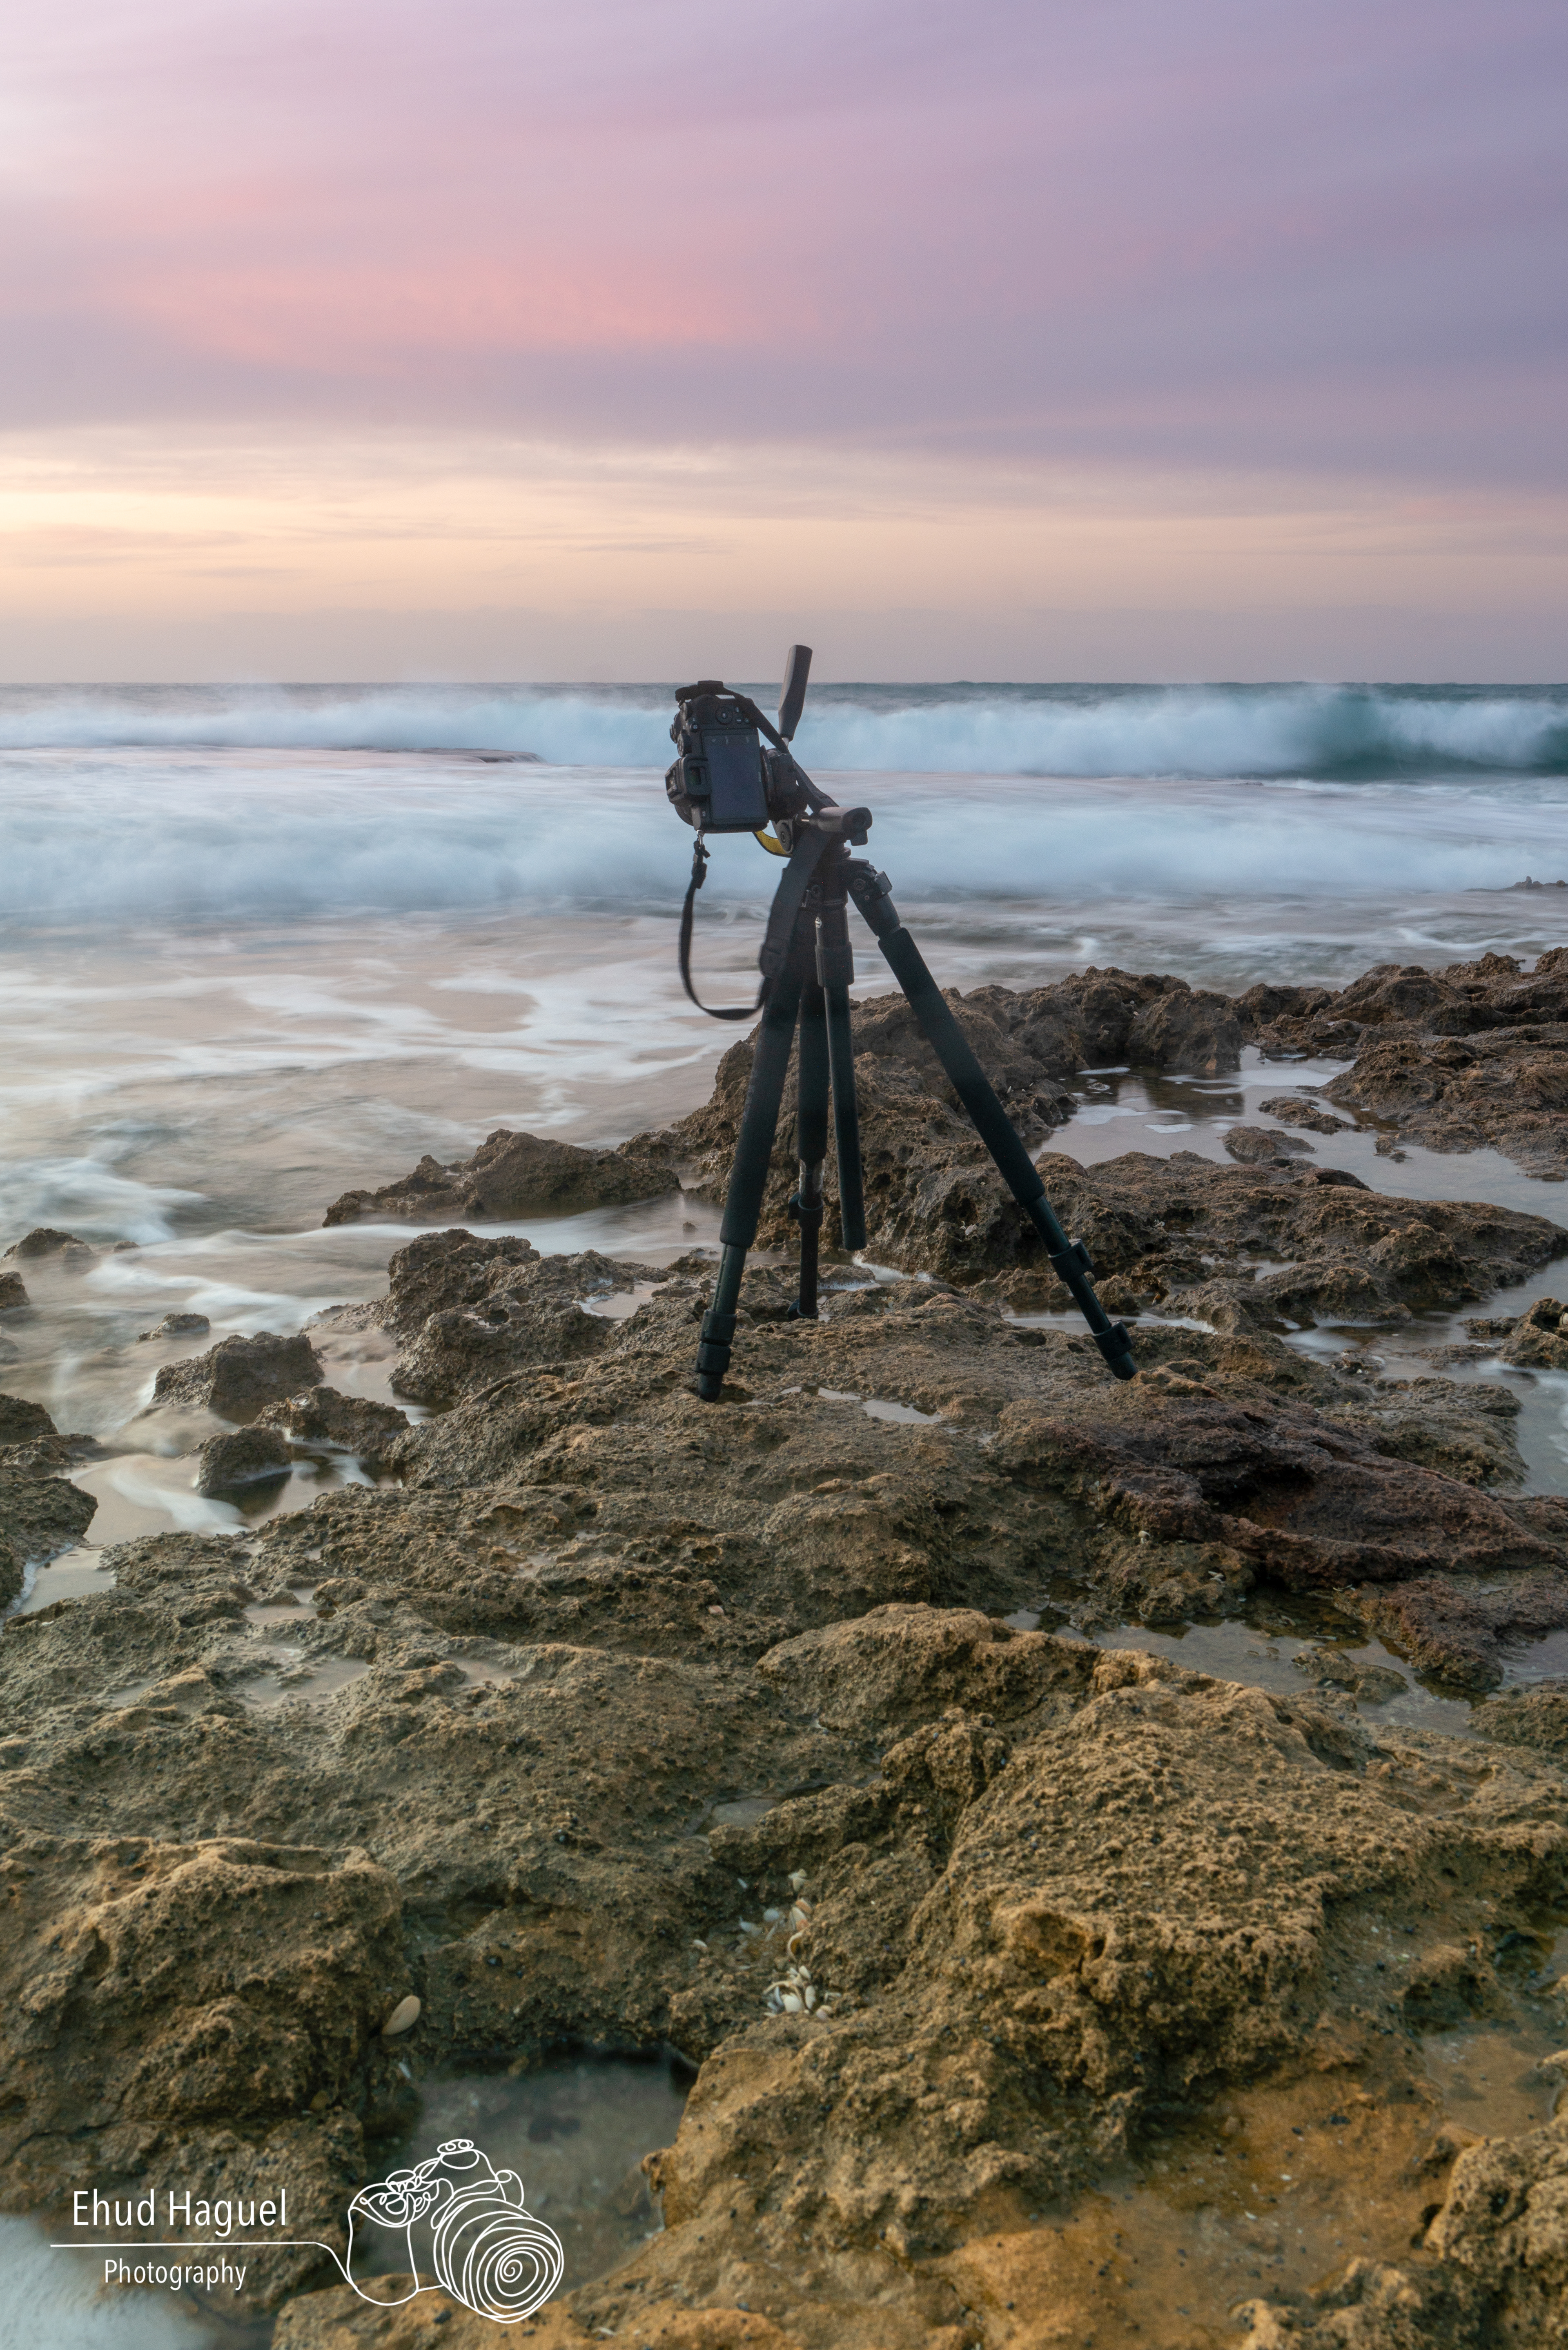
• Step 1: Set up and compose. Position the tripod, frame the shot, and confirm the composition before anything else.
• Step 2: Set focus. Lock focus on the appropriate point in the scene. Confirm in live view, zoomed in on a critical foreground detail.
• Step 3: Set base exposure. Without any ND filter attached, meter the scene and note the base shutter speed for correct exposure. You will use this to calculate the filtered equivalent.
• Step 4: Attach the ND filter. With focus locked and composition confirmed, attach the filter. Do not touch focus after this point.
• Step 5: Calculate and set the long exposure. Use an ND exposure calculator app or reference chart to convert the base exposure to the filtered equivalent. Set Bulb mode if the exposure exceeds the camera's maximum shutter speed.
• Step 6: Disable stabilization. Turn off IBIS and lens stabilization. On a solid tripod, active stabilization can introduce subtle movement rather than reduce it.
• Step 7: Trigger remotely. Use a remote release, intervalometer, or the camera's self-timer to trigger without touching the body. Any reliable wired remote, Bluetooth remote, or intervalometer compatible with your camera system will do the job. For longer Bulb exposures, a basic intervalometer can make the process much easier and more repeatable.
• Step 8: Review and adjust. Check the histogram rather than the LCD for exposure accuracy. Review edges for any movement in elements that should be sharp. Adjust and repeat.
7. The Equipment I Use
For stability, I use the Leofoto LS-362C for landscape work. It is compact enough to carry on long hikes (1.11kg, folds to 260mm), but still stable enough for the kind of multi-minute exposures I shoot in the field.
For lenses, I prefer a wide zoom for most long exposure landscape work. The Panasonic Lumix S PRO 16-35mm f/4 covers the focal lengths most useful for foreground-driven compositions, is sharp across the frame at f/8 to f/11, and is practical to use with circular filters. If you use several lenses with different filter thread sizes, a step-up ring set makes it much easier to share the same ND and polarizing filters across your kit. When I want more compression between foreground and background, the Panasonic Lumix S PRO 24-70mm f/2.8 works well.
For photographers on other systems, strong wide-angle options include the Sony FE 16-35mm f/2.8 GM II, Nikon Z 14-24mm f/2.8 S, Canon RF 15-35mm f/2.8L IS USM, and Sigma 14-24mm f/2.8 DG DN | Art.
8. Post-Processing Long Exposure Images
• RAW format is essential. The dynamic range in landscape scenes is often extreme, and RAW files preserve the information needed to handle it properly.
• Noise reduction should be applied selectively, targeting the sky and darker zones without destroying the texture in rocks or vegetation.
• Graduated adjustments allow the sky and foreground to be treated independently: darkening a bright sky without affecting a well-exposed foreground, or lifting shadow detail without blowing the highlights.
• Water and motion rendering benefits from careful shadow lifting and a slight reduction in clarity to separate the water surface tonally from its surroundings. Avoid over-processing. The most compelling long exposure water images retain luminosity rather than looking flat or artificial.
• Geometry should be corrected before any other adjustments. Even a carefully leveled tripod can produce a slightly tilted horizon. Fix it first so all subsequent work is based on the final framing.
9. Common Mistakes
• Shooting in wind without accounting for tripod stability. Wind causes subtle vibration that transfers to the camera and blurs the static elements. Weight the tripod, position it behind a windbreak, or use a heavier setup on exposed locations.
• Extending the exposure beyond the point of useful effect. Beyond a certain duration, extending the shutter does not add to the image. It just makes the water lighter and flatter. Learn to recognize when the effect is complete and stop there.
• Leaving image stabilization on during a tripod exposure. Active stabilization on a locked-down camera can introduce movement. Turn it off for any long tripod-based exposure.
• Not checking for moisture on the lens. Near water or in coastal conditions, condensation can form on the front element between frames without being immediately visible. Check the glass regularly during the session. A small blower and lens cloth are worth keeping in the bag, especially when shooting near surf, mist, or moving water.
• Focusing after the ND filter is attached. Strong ND filters can cause autofocus to hunt or fail entirely. Always lock focus before the filter goes on.
• Over-smoothing the water in post. The motion blur in the original capture is the effect. Post-processing should enhance it, not manufacture it.
• Packing up before blue hour. The period just after sunset is often the best light of the session for long exposure work. The ambient light level drops naturally, extending shutter speeds without heavy ND filters, and the color temperature produces rich tones in both water and sky.
For me, long exposure is not just about smoothing water or stretching clouds. It is about slowing the process down enough to see structure, balance, and atmosphere more clearly before pressing the shutter. The technique demands patience, and that patience is part of what makes the results worth the effort. When it works, the final image feels less like a record of the moment and more like a distilled version of it.
For golden hour light that pairs naturally with long exposure, see Art of Sunset Photography. For the compositional decisions that make long exposure images work as photographs, see The Art of Composition in Photography. For the exposure fundamentals behind shutter speed and aperture choices, see The Exposure Triangle.
Leofoto Coupon Code: 12% Off with EH12
Use code EH12 at checkout on the Leofoto website to get 12% off Leofoto tripods, ball heads, monopods, and accessories. This Leofoto discount code is active and available to readers of this site.