Mastering the Art of Sunset Photography: Light, Timing, Exposure, and Composition
Sunset photography looks simple from the outside. You point the camera at a beautiful sky and press the button. In practice, the difference between a snapshot and a photograph that holds attention comes down to timing, preparation, and understanding how to work with the light rather than against it. Here is what I have learned about making the most of the golden hour.
1. What Makes a Sunset Worth Photographing
Not every beautiful sunset makes a strong photograph. Understanding the difference is one of the most practical skills in this genre.
Completely clear skies often produce flat, uninspiring light. The sky turns orange, then fades — there is no texture, no variation, nothing for the eye to move through. What makes sunset images compelling is usually the presence of clouds, haze, or atmospheric conditions that catch and diffuse the light in interesting ways.
High, thin clouds are often the best condition. They act as a natural reflector and diffuser, catching the color from below and spreading it across a large area of sky. Low, heavy cloud cover often blocks the light entirely — but a break near the horizon just as the sun drops can produce some of the most dramatic light of all.
Haze and atmospheric particles — dust, humidity, pollen — can add warmth and softness to sunset light that a perfectly clear atmosphere does not. In certain conditions, this is exactly what gives a sunset its character.
The practical habit is to check the sky actively in the hour before sunset, not just at the moment it peaks. Conditions change quickly, and sometimes the best light happens earlier than expected.
2. Before Sunset, Peak Sunset, and After
One of the most common mistakes in sunset photography is leaving too early.
Before sunset — the approach phase
In the 30 to 60 minutes before the sun reaches the horizon, the light is warm, directional, and manageable. Contrast is lower than at midday, and the angle of light is favorable for revealing texture and depth in the landscape. This is often a good time to work on compositions that depend on the land rather than the sky — the foreground is well lit, and the sky is not yet competing for attention.
Peak sunset — the short window
As the sun approaches and crosses the horizon, the sky changes rapidly. Colors deepen, contrast increases between sky and land, and the window for the most dramatic images is often only a few minutes. This is the moment you need to be positioned and ready — not still adjusting the tripod or choosing a lens.
After the sun drops — the afterglow
Many photographers leave at this point. This is a mistake. In the 10 to 20 minutes after the sun disappears below the horizon, the sky often produces some of its most subtle and beautiful color. The light becomes more even, the color more complex, and the contrast between sky and land softens. Silhouettes become cleaner. Long exposures become more manageable.
The afterglow phase frequently produces the strongest images of a session. Stay until the light is truly gone.
3. Timing and Planning
Arrive at your location well before the sunset. This is not just a suggestion — it is the difference between a composed, intentional image and a rushed one. Check weather forecasts before you go. Completely clear skies often produce flat light. Some cloud cover — particularly high, thin clouds — can catch the color and create far more interesting skies.
Scout the location in daylight if you can. Identify where the foreground elements are, where the sun will set relative to the scene, and where you want to be standing when the light peaks. Walking a location in full light takes a few minutes. Walking it in fading light while trying to compose is a much more difficult problem.
4. Camera Parameters
a. ISO
Keep ISO as low as possible — typically ISO 100 or 200. The golden hour provides ample natural light, and a low ISO maintains maximum image quality with minimal noise.
b. Shutter Speed
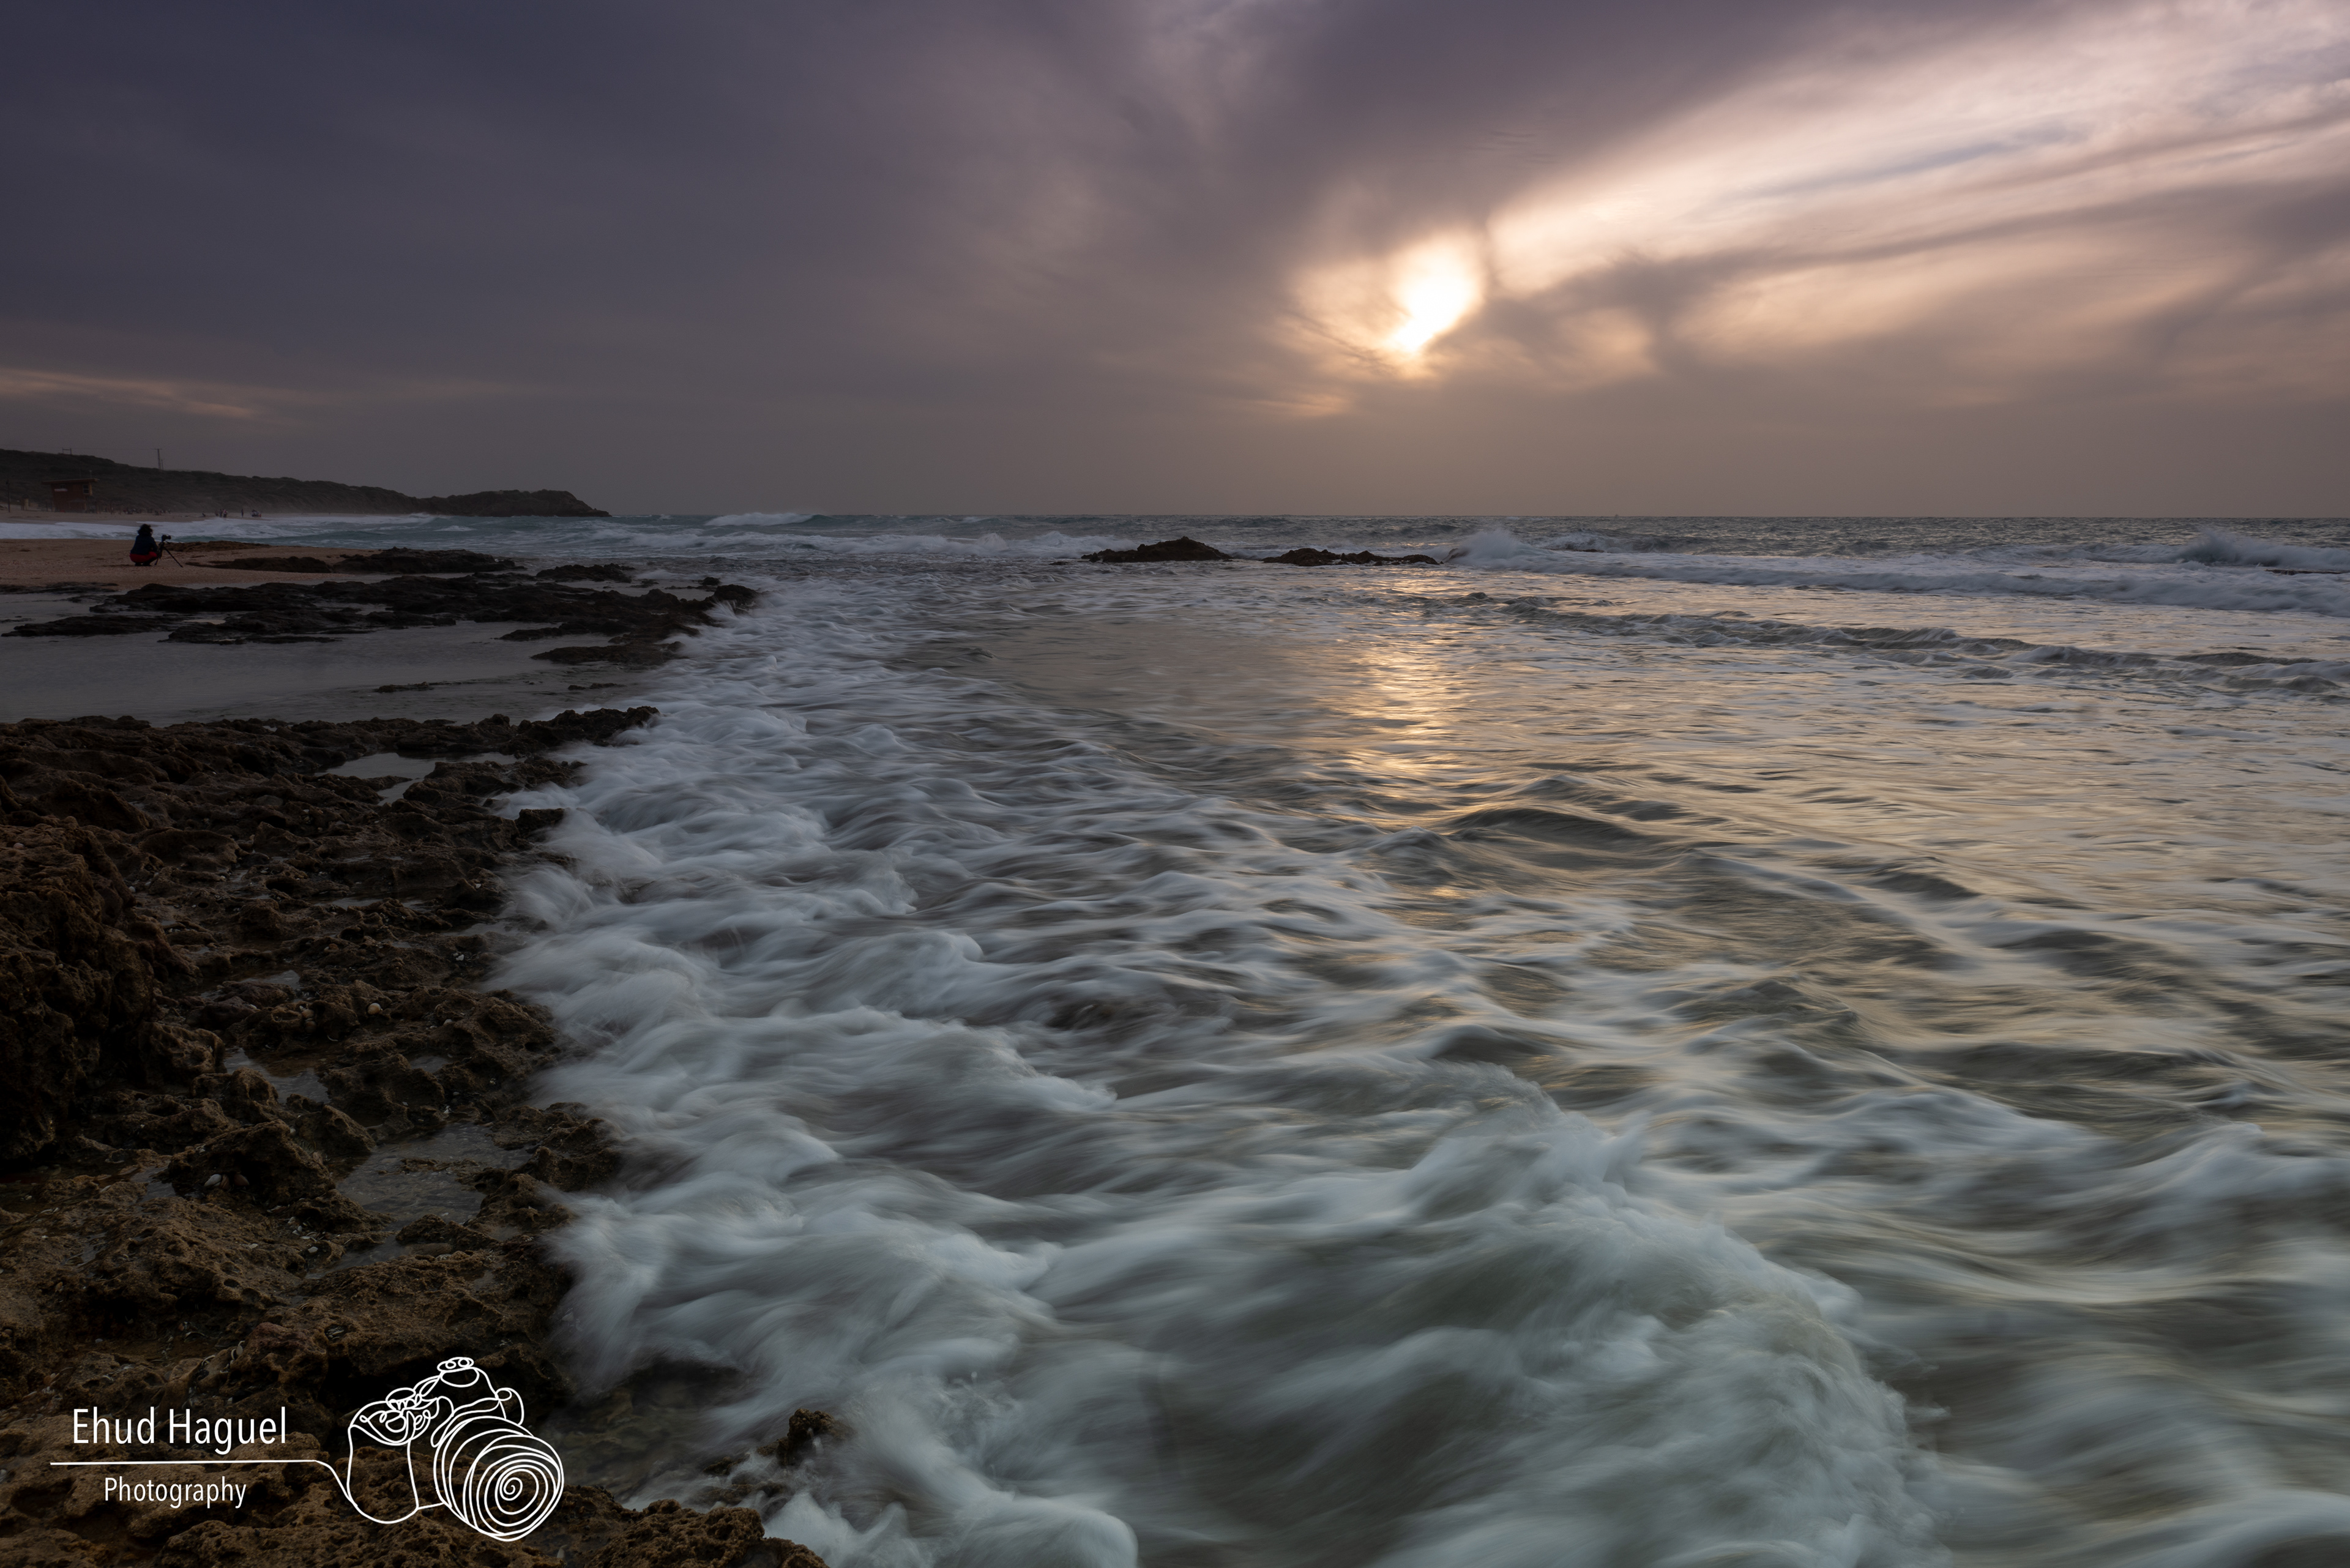
Adjust shutter speed based on what you want to achieve. For stationary scenes with sharp detail, use faster speeds such as 1/250 or 1/500 second. For motion — the flow of water, the movement of clouds — slower speeds like 1/30 or 1/15 second create a different quality. Long exposures at sunset, with an ND filter, can smooth water surfaces and stretch cloud movement into something painterly.
c. Aperture
For landscapes where you want sharpness from foreground to horizon, apertures between f/8 and f/16 are usually the most useful range. Stopping down further can increase depth of field slightly, but diffraction will begin to soften fine detail — so there is rarely a reason to go beyond f/16 unless the scene specifically demands it.
d. Focal Length
A wide-angle lens like the Panasonic Lumix S PRO 16-35mm f/4 is my first choice for sunset landscapes — it captures the expanse of the sky and allows you to include strong foreground elements. A standard zoom like the Panasonic Lumix S PRO 24-70mm f/2.8 gives more compositional flexibility. A telephoto lens can isolate the sun behind a subject or compress the layers of a scene in a way that wide lenses cannot — this is worth experimenting with even if your default is wide.
5. Exposure Decisions at Sunset
Sunset scenes are high-contrast situations, and the exposure decision is rarely simple.
Exposing for the sky protects the highlight detail in the clouds and the sun area, but may leave the foreground dark or underexposed. Exposing for the foreground risks blowing out the sky entirely. Neither is automatically correct — the right choice depends on what the image is about.
When the sky is the subject and the foreground is a simple silhouette, exposing for the sky is usually the stronger choice. When the foreground has important detail — rocks, water, a person — protecting it matters more, and a GND filter or bracketing can help balance the two.
Bracketing is a practical approach when you are uncertain: take the same composition at multiple exposures and decide in post which rendering serves the image. HDR processing can work when used with restraint, but aggressive HDR tends to produce an artificial look that undermines the natural character of sunset light.
The most common exposure error in sunset photography is clipping highlights around the sun or in the brightest part of the sky. Check the histogram or use highlight warnings after each shot — it is much easier to recover shadow detail than blown highlights.
6. Working With Silhouettes
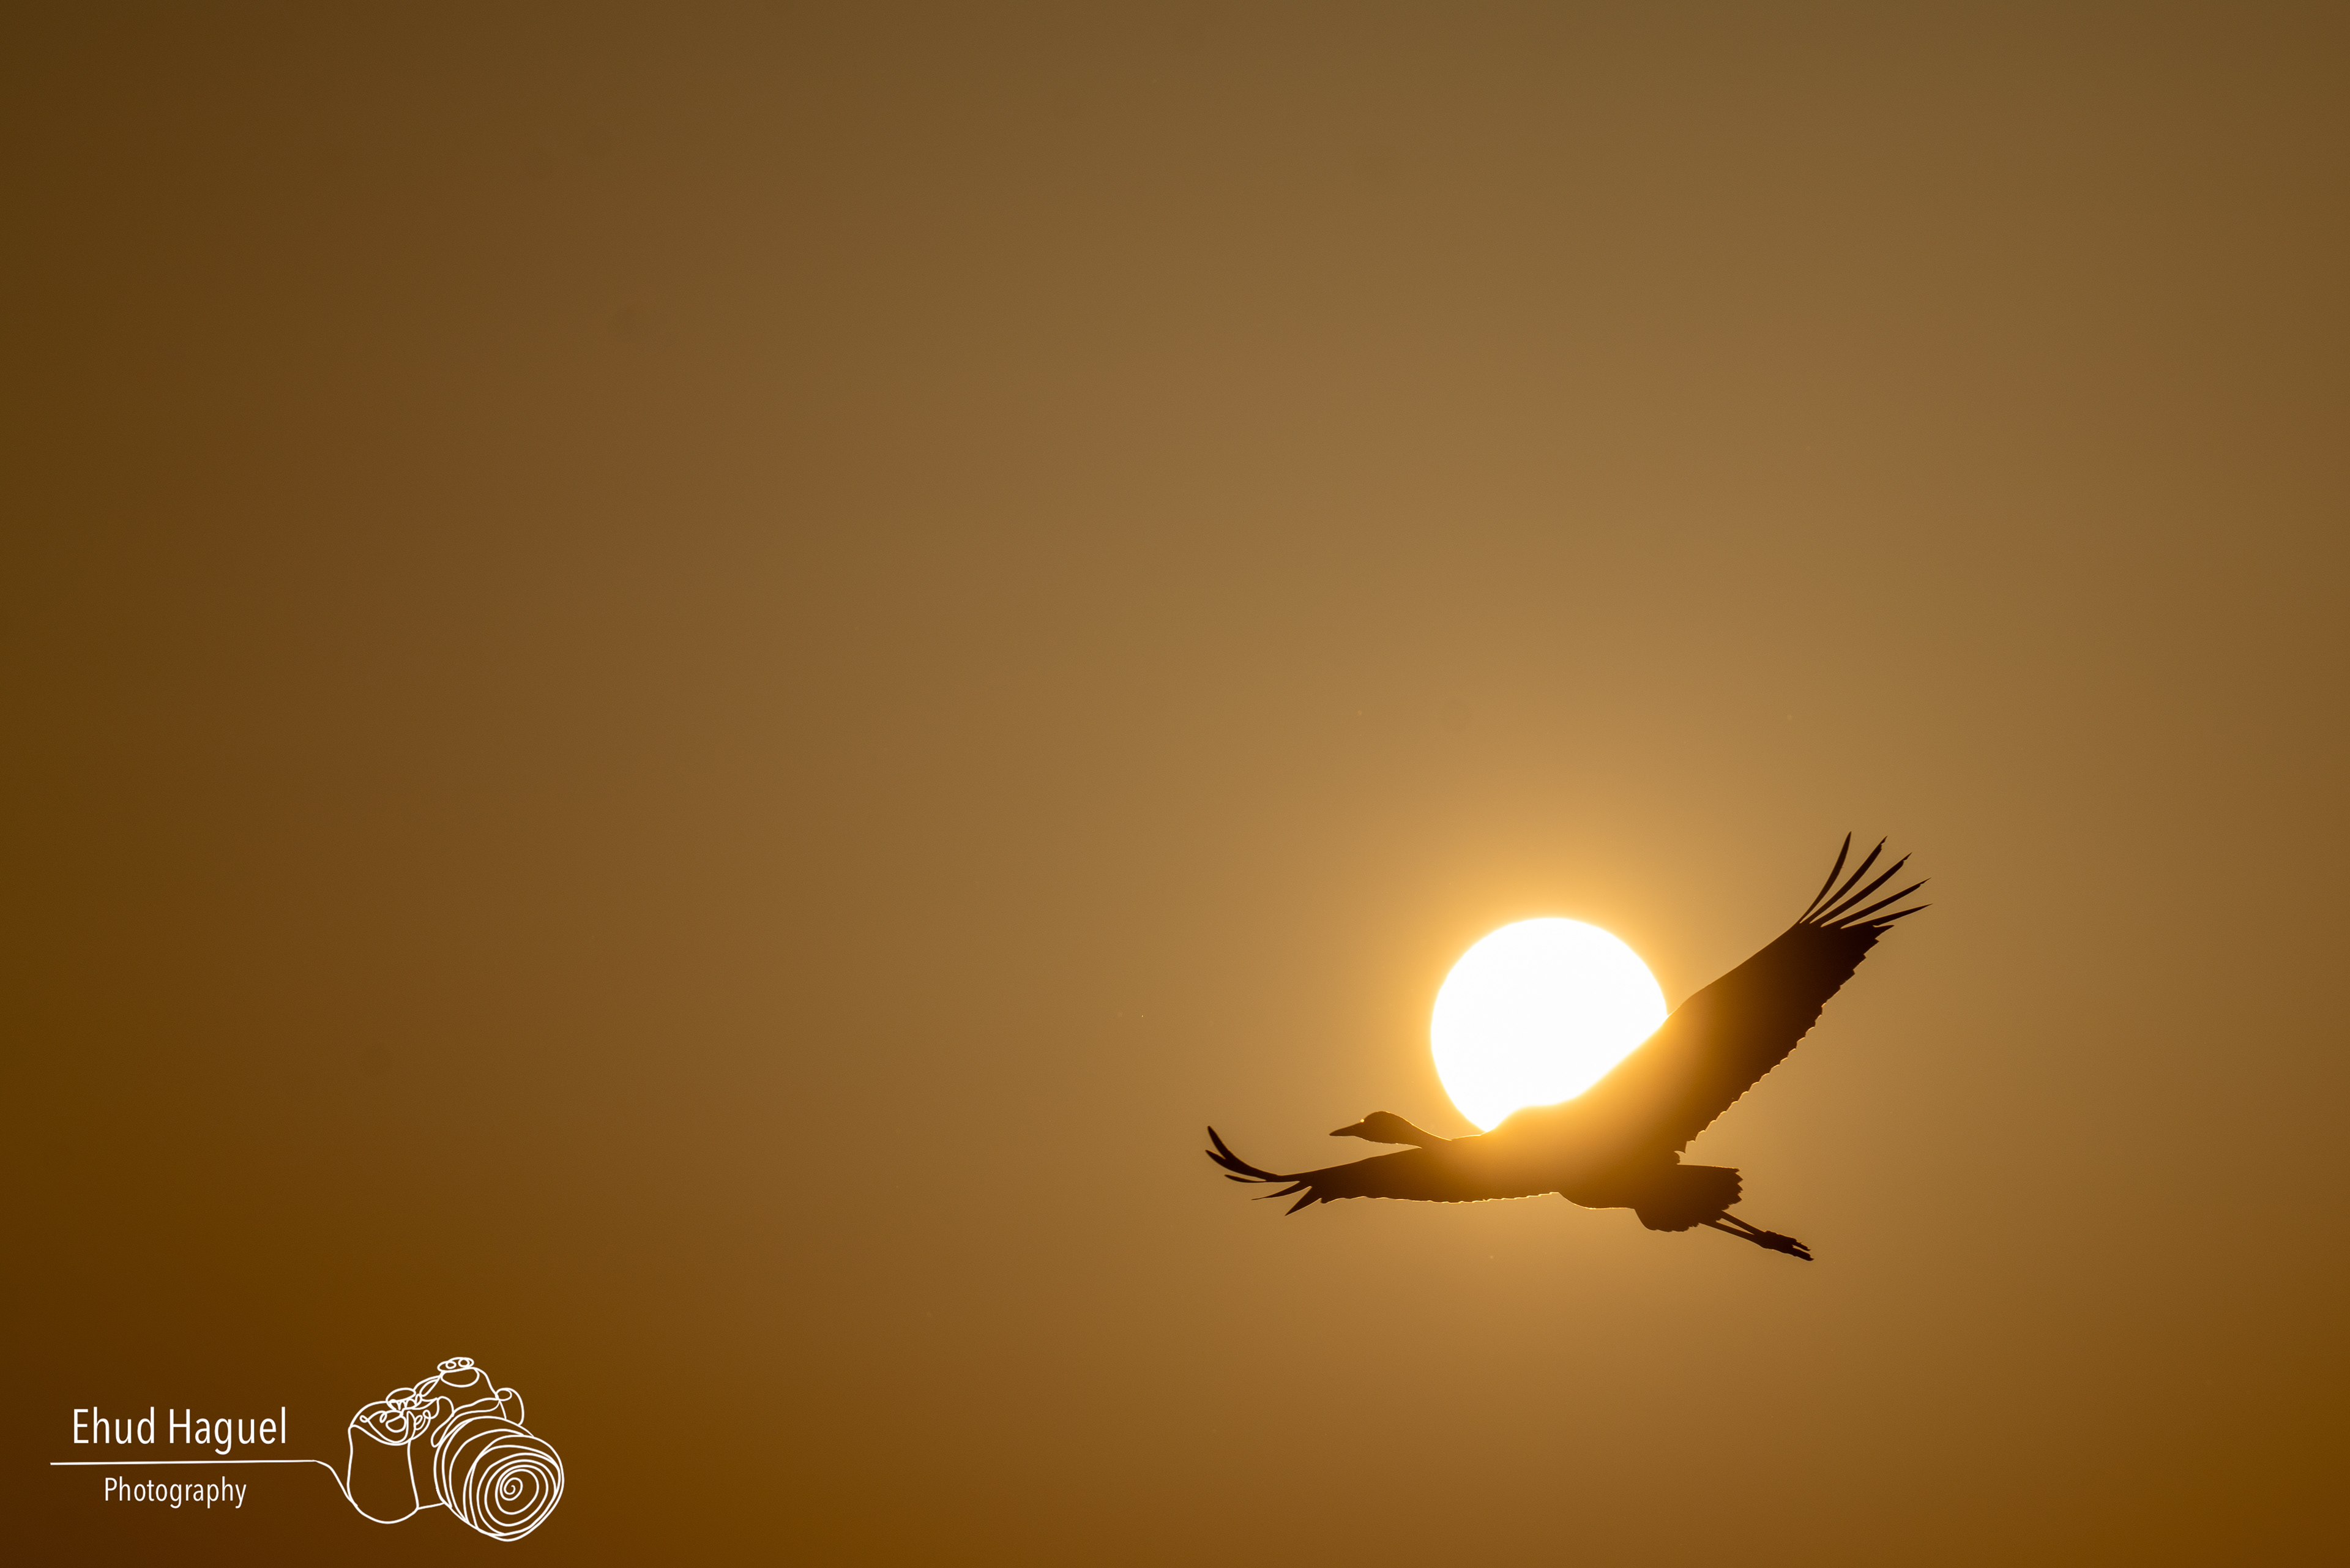
Silhouettes are one of the most powerful compositional tools in sunset photography. When the sky is bright and complex, a clean, dark foreground element can give the image a strong focal point and visual structure.
The key to a strong silhouette is the shape. A tree with a clear, recognizable profile works. A person with a defined pose works. A shapeless mass of vegetation or an indistinct horizon does not — the silhouette needs to read clearly even without color or detail.
Spacing matters when there are multiple silhouette elements. If they overlap into an unreadable mass, the silhouette loses its clarity. Small changes in position can separate elements that were merging and make the composition significantly cleaner.
Expose for the sky rather than the silhouette. The subject should be dark — that is the point. If the silhouette is exposing itself out of darkness into visible detail, the sky is probably overexposed.
7. Foreground Strategy
A sunset sky without a strong foreground is a background without a photograph. The foreground is what makes the image specific rather than generic.
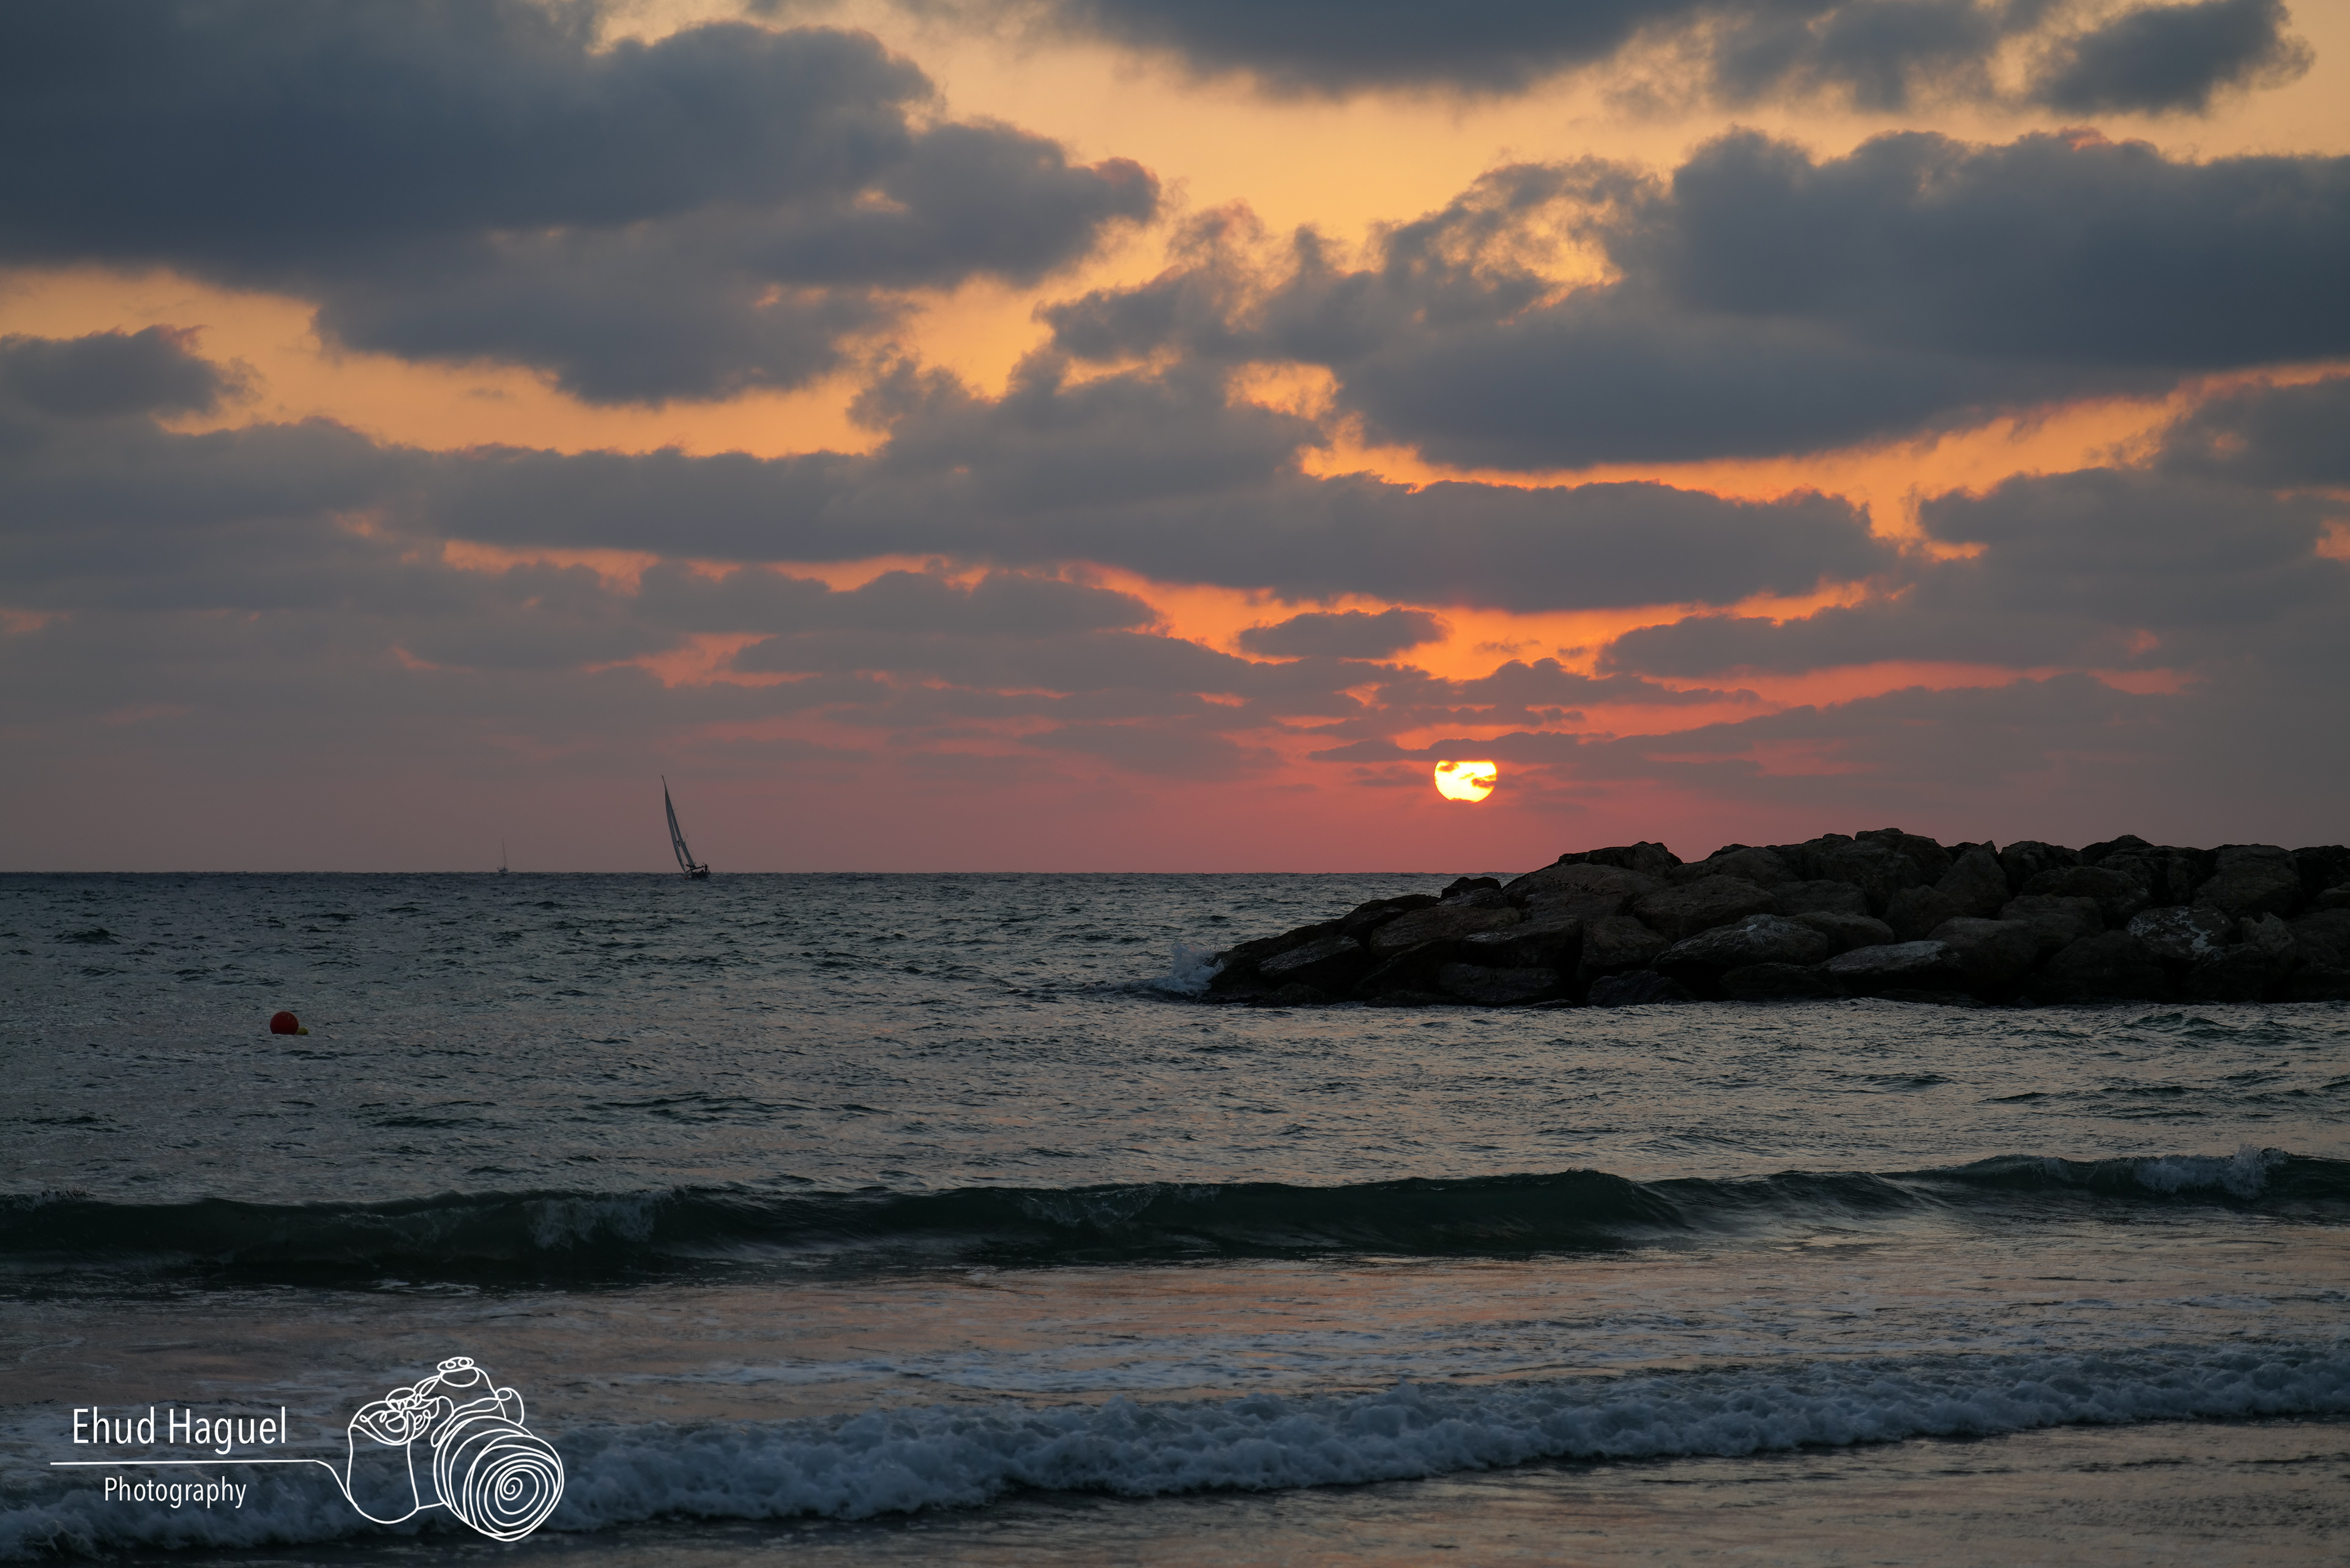
Effective foreground elements at sunset include rocks and coastal formations, leading lines such as a shoreline or a path, water surfaces that reflect the sky, tree lines or single trees with clear silhouette shapes, and structures — jetties, fences, ruins — that add human context.
The foreground does not just fill the bottom of the frame. It creates depth, gives the viewer a starting point, and connects the sky to the earth. When the foreground and sky work together — when the foreground leads the eye toward the light — the image holds together as a unified composition rather than a sky picture with something in front of it.
8. Compose Intentionally
The most common mistake in sunset photography is pointing the camera at the sky and ignoring everything else. Use the rule of thirds — place the horizon on the upper or lower third rather than in the middle. Experiment with your position and angle before the light peaks, so that when the sky becomes extraordinary you are already in the right place.
Consider whether wide, standard, or telephoto serves the scene. Wide captures scale and includes foreground. Standard balances sky and land without dramatic distortion. Telephoto compresses distance, isolates the sun behind a subject, and can create layered silhouettes in a way that wide lenses cannot.
9. Common Sunset Photography Mistakes
• Arriving too late. The best preparation happens before the light peaks. Arriving just as the sky turns orange means composing under time pressure and missing the approach phase entirely.
• Photographing only the sky. A sky without foreground structure is a record of a moment, not a photograph. The foreground is what makes the image work compositionally.
• Putting the horizon in the center by default. A centered horizon divides the frame into two equal halves without hierarchy or direction. Decide whether the sky or the land is more interesting, and give it the larger portion of the frame.
• Leaving after the sun drops. The afterglow is often the best phase of the session. The photographers who stay are the ones who come home with the strongest images.
• Over-saturating in editing. Sunset images are frequently pushed too far in post. The original light already has strong color — restraint in editing preserves the natural quality that makes sunset light compelling. Oversaturated images tend to look artificial and garish.
• Clipping highlights. Blown-out sky around the sun is one of the most common and least recoverable mistakes in sunset photography. Watch the histogram.
• Relying on the sunset instead of the composition. A dramatic sky does not automatically produce a strong image. The composition has to work — foreground, structure, and framing — independent of how impressive the light is.
10. Use a Tripod and Remote Shutter Release
For any exposure below 1/60 second, a tripod is not optional. I use a Leofoto LS-362C for landscape work — it is compact enough to carry on longer hikes and rigid enough to hold steady on uneven ground. Pair it with a remote shutter release or use the camera's self-timer to eliminate vibration at the moment of exposure.
11. Recommended Filters
a. Graduated Neutral Density (GND) Filters
GND filters balance the exposure between a bright sky and a darker foreground. They are most useful when the horizon is relatively straight — on uneven horizons with trees or hills, the gradient line becomes visible and the filter less effective. Quality options include the Lee Filters Graduated Neutral Density Filters and NiSi Medium GND Filters.
b. Circular Polarizing Filter (CPL)
A CPL filter reduces glare and reflections, deepens tones in the sky, and improves color saturation. It is particularly useful near water. Note that a CPL can create uneven darkening across a wide-angle sky — check the result carefully before committing to a long exposure. Quality options include the B+W Circular Polarizer and Hoya HD Circular Polarizer.
c. Solid Neutral Density (ND) Filters
ND filters allow longer shutter speeds in bright conditions — what makes smooth water and soft cloud movement possible in daylight. Use them when the creative effect of motion is the point, not just because the filters are available. Quality options include the Haida PRO II Neutral Density Filters and Singh-Ray Neutral Density Filters.
Sunset photography rewards the photographers who stay longest, prepare most carefully, and resist the temptation to point the camera only at the sky. The light is short. The composition has to be ready before it peaks, and the patience to stay through the afterglow is often what separates the strongest images from the ones that almost worked.
For a deeper look at how aperture, shutter speed, and ISO interact, see The Exposure Triangle. If you want to extend your work into long exposure technique, Landscape Photography with Long Exposure covers exactly that. For compositional thinking that applies directly to sunset work, see The Art of Composition in Photography.
Leofoto Coupon Code: 12% Off with EH12
Use code EH12 at checkout on the Leofoto website to get 12% off Leofoto tripods, ball heads, monopods, and accessories. This Leofoto discount code is active and available to readers of this site.